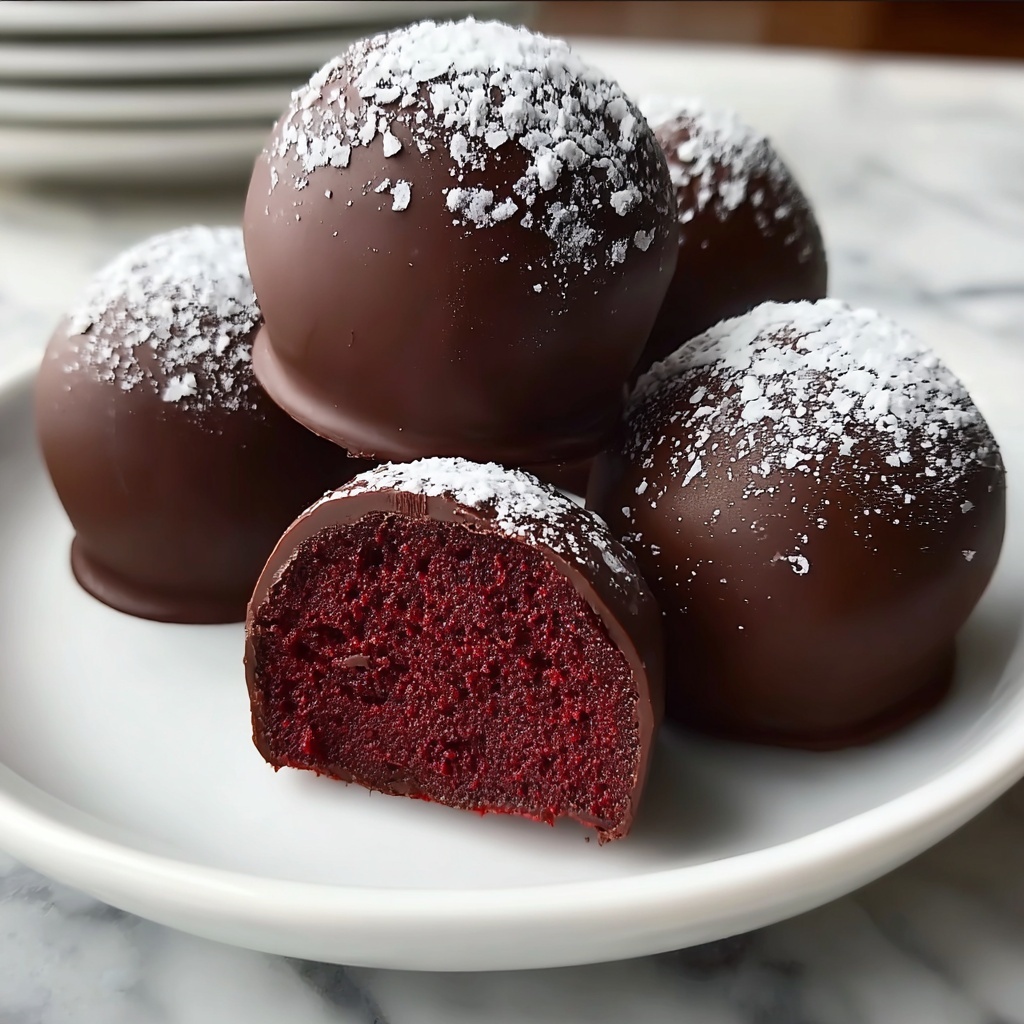
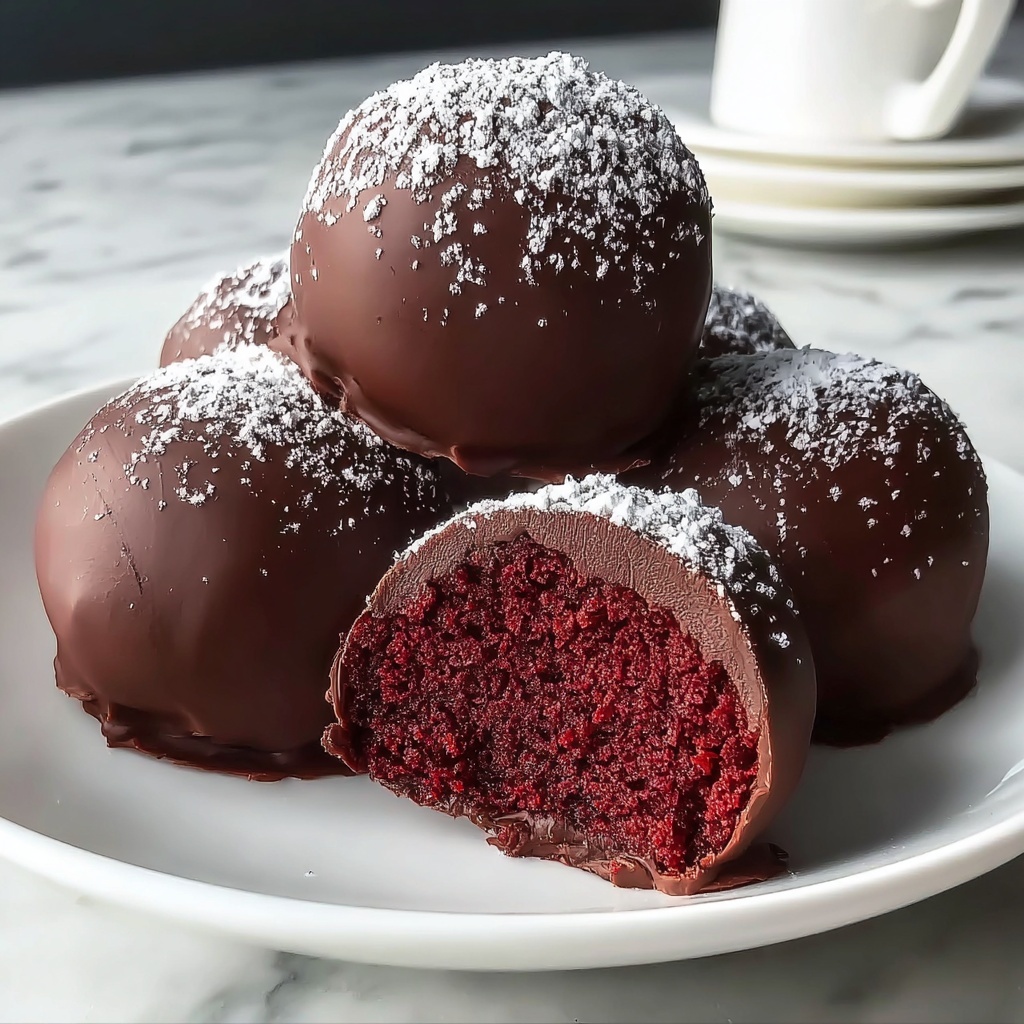
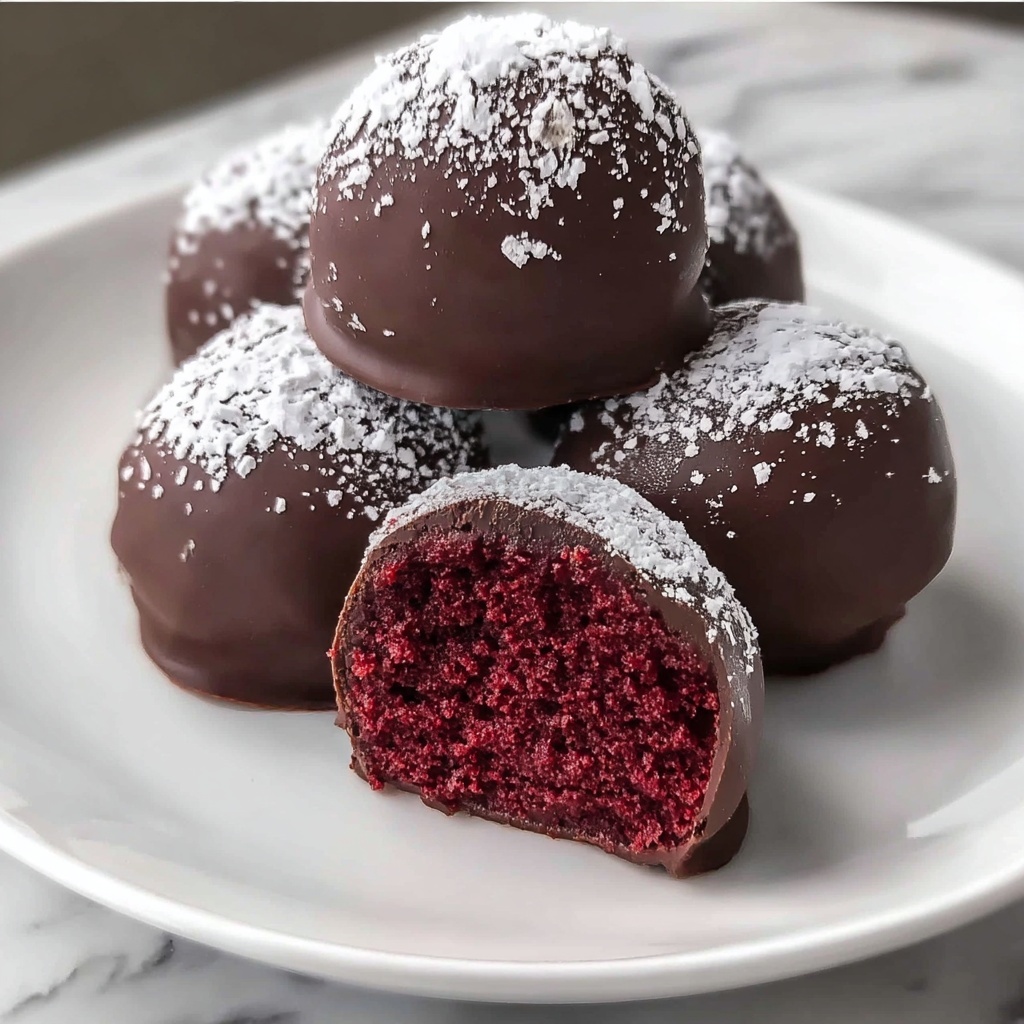
If you have a sweet tooth and adore the rich, velvety flavor of red velvet but want something quick and fuss-free, then this No Bake Red Velvet Cake Balls Recipe is going to be your new best friend. Imagine bite-sized cake spheres that are indulgent yet simple to make, combining the lush taste of red velvet cake with a creamy cream cheese binder and a luscious chocolate coating. These cake balls are not just delicious; they bring a fun and elegant twist to any dessert table without requiring an oven or hours in the kitchen. Get ready to fall in love with an easy homemade treat that’s perfect for any occasion.
Ingredients You’ll Need
These ingredients are wonderfully straightforward, each playing a vital role in creating the perfect texture and flavor balance for your No Bake Red Velvet Cake Balls Recipe. From the rich cream cheese providing moisture and tang to the chocolate that adds a decadent finish, every component is essential.
- Red velvet cake mix: This is the foundation of your cake balls, delivering the classic red velvet flavor and color.
- Cream cheese, softened: Adds creaminess and moisture that helps bind the cake crumbs into perfect rolling consistency.
- Powdered sugar: Sweetens the mixture gently and helps achieve a smooth texture.
- Vanilla extract: Enhances the flavor depth and adds a subtle aromatic touch.
- Chocolate chips: For melting and coating the cake balls, providing a silky, rich shell that contrasts beautifully with the soft inside.
How to Make No Bake Red Velvet Cake Balls Recipe
Step 1: Mix Ingredients
Begin by mixing the red velvet cake mix, softened cream cheese, powdered sugar, and vanilla extract in a bowl. The cream cheese should be soft enough to blend easily, creating a uniform dough that’s not too dry or sticky. This blend is the key to getting your cake balls moist and rich while ensuring they hold together well.
Step 2: Form the Balls
Once your mixture is ready, use your hands to roll it into small, evenly sized balls—about one inch in diameter works perfectly. This step is where the batter transforms from a simple mixture to delightful bite-sized treats, so take your time to make them smooth and consistent.
Step 3: Chill the Balls
Place the rolled cake balls onto a baking sheet and pop them into the refrigerator for at least 30 minutes. Chilling firms them up, making the next step of dipping much cleaner and easier.
Step 4: Melt the Chocolate
Melt your chocolate chips using a microwave or a double boiler method. Be patient and stir frequently for a glossy, smooth coating. This chocolate will soon become the luscious outer shell that gives each bite its wonderful snap and richness.
Step 5: Coat the Cake Balls
Dip each chilled cake ball into the melted chocolate, ensuring it’s fully covered. Use a fork to lift them out, allowing excess chocolate to drip off, and place them back on the baking sheet. Let the chocolate set completely at room temperature or briefly in the fridge, and then they’re ready to enjoy.
How to Serve No Bake Red Velvet Cake Balls Recipe
Garnishes
To jazz up your cake balls, consider sprinkling some crushed red velvet cake crumbs, edible glitter, or colorful sprinkles over the wet chocolate coating before it sets. These garnishes add festive flair and texture that make each bite even more exciting.
Side Dishes
While these cake balls are delightful on their own, they pair beautifully with fresh berries or a dollop of whipped cream for an added layer of freshness. A cup of rich coffee or a glass of milk also complements their sweetness wonderfully.
Creative Ways to Present
For parties, serve your No Bake Red Velvet Cake Balls Recipe on a decorative platter with toothpicks inserted for easy grabbing. Alternatively, place them in colorful mini cupcake liners or arrange them in a tiered dessert stand to create a stunning visual impact that will wow your guests.
Make Ahead and Storage
Storing Leftovers
You can store leftover Red Velvet Cake Balls in an airtight container in the refrigerator for up to one week. This keeps the chocolate shell crisp and the interior moist, so they stay fresh and delicious between servings.
Freezing
If you want to prepare in advance, freeze the cake balls on a tray, then transfer them to a freezer-safe container or zip-top bag. They will keep well for up to three months. Thaw them in the fridge before serving to maintain their texture.
Reheating
Since these are best enjoyed chilled or at room temperature, reheating is generally not recommended. If you prefer a softer texture, let them sit out for about 15 minutes rather than warming them up, which could melt the chocolate unevenly.
FAQs
Can I use homemade red velvet cake instead of cake mix?
Absolutely! Crumble your homemade red velvet cake and follow the same method. Just ensure it’s fully cooled and slightly drier for easier rolling and binding with the cream cheese mixture.
What type of chocolate is best for coating?
Semi-sweet or milk chocolate chips work best as they create a smooth, sweet coating. You can also use white chocolate for a twist, but you may want to add a bit of oil to thin it out for dipping.
How do I prevent the chocolate from cracking?
Make sure to dip the chilled balls and allow the chocolate to set at room temperature rather than in the freezer. Rapid cooling can cause cracking. Using a good quality chocolate also helps create a flexible shell.
Can I add fillings or flavors inside the cake balls?
Yes! You can add a small piece of cream cheese frosting, a nut, or even a raspberry inside each ball for a surprise center. Just adjust rolling carefully to keep them well sealed before chilling.
Are these cake balls gluten-free?
This recipe depends on the cake mix you choose. To make gluten-free red velvet cake balls, use a gluten-free red velvet cake mix and ensure all other ingredients are also gluten-free.
Final Thoughts
Trust me, once you make this No Bake Red Velvet Cake Balls Recipe, it will become your go-to dessert for any occasion that calls for effortless elegance and irresistible flavor. They are so simple to prepare yet feel absolutely special. Whether for a casual treat or a fancy gathering, these little cake balls are guaranteed to bring smiles and satisfy cravings. Give them a try and watch how quickly they disappear!
Print
No Bake Red Velvet Cake Balls Recipe
- Prep Time: 15 minutes
- Cook Time: 0 minutes
- Total Time: 45 minutes
- Yield: 12 servings
- Category: Dessert
- Method: No-Cook
- Cuisine: American
Description
These No Bake Red Velvet Cake Balls are a delightful, easy-to-make dessert combining the rich flavor of red velvet cake mix with smooth cream cheese and a sweet vanilla touch, all coated in decadent melted chocolate. Perfect for parties or an indulgent treat, they require no baking and come together in under an hour.
Ingredients
Cake Ball Mixture
- 1 cup red velvet cake mix
- 1/2 cup cream cheese, softened
- 1/4 cup powdered sugar
- 1 teaspoon vanilla extract
Coating
- 1 cup chocolate chips
Instructions
- Prepare the mixture: In a medium bowl, combine the red velvet cake mix, softened cream cheese, powdered sugar, and vanilla extract. Stir well until the mixture is smooth and fully blended.
- Form cake balls: Use your hands or a small scoop to roll the mixture into small, evenly sized balls, about 1 inch in diameter.
- Chill: Place the cake balls on a baking sheet or plate and refrigerate for 30 minutes to firm up, making them easier to coat.
- Melt chocolate: Gently melt the chocolate chips using a microwave in 20-second intervals, stirring between each, or use a double boiler until completely smooth.
- Coat cake balls: Dip each chilled cake ball into the melted chocolate, ensuring it is fully coated, then place them back on the baking sheet.
- Set the chocolate: Allow the chocolate-covered cake balls to sit at room temperature or refrigerate until the coating is firm and set before serving.
Notes
- To prevent the cake balls from sticking, line the baking sheet with parchment paper.
- Use high-quality chocolate for a richer flavor and smoother coating.
- Store cake balls in an airtight container in the refrigerator for up to 5 days.
- For a decorative touch, sprinkle crushed nuts, sprinkles, or drizzle contrasting chocolate before the coating sets.
- Ensure cream cheese is softened to room temperature for easier mixing.


