“`html
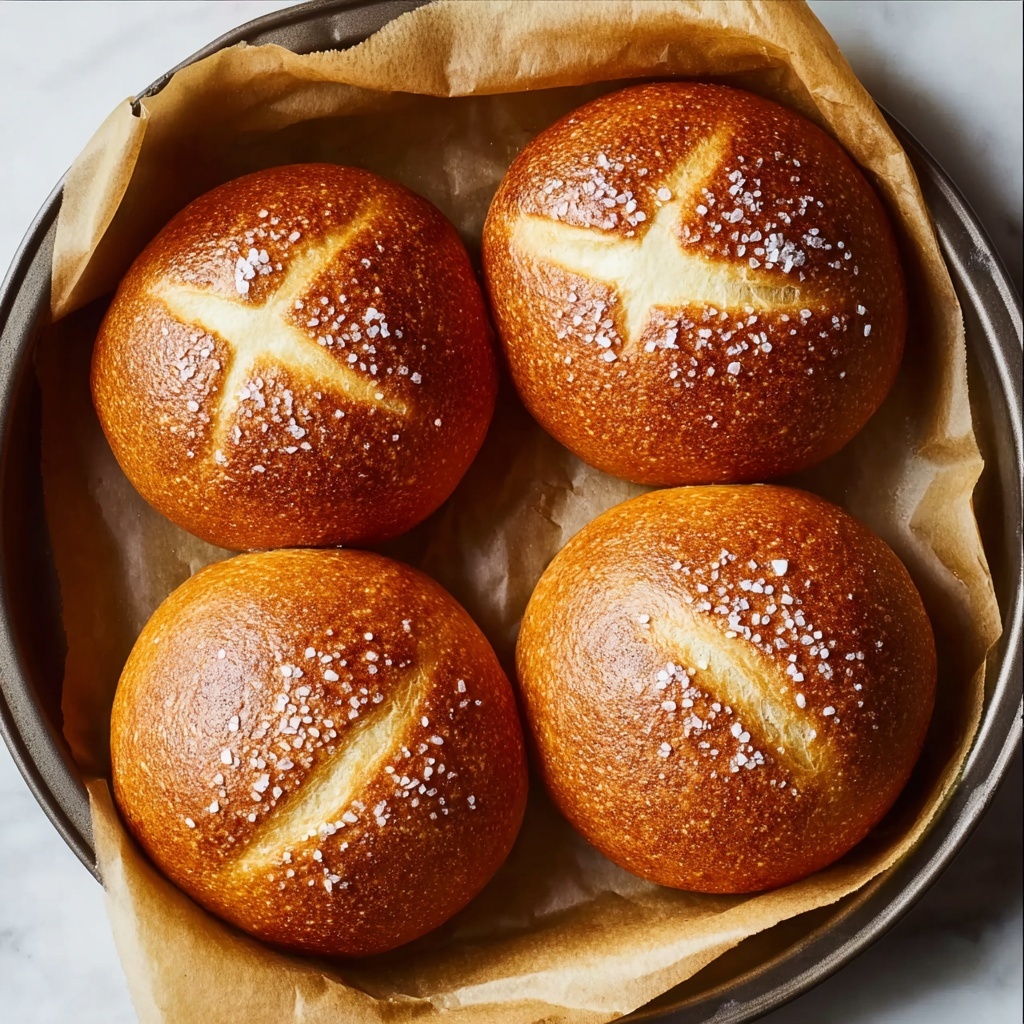
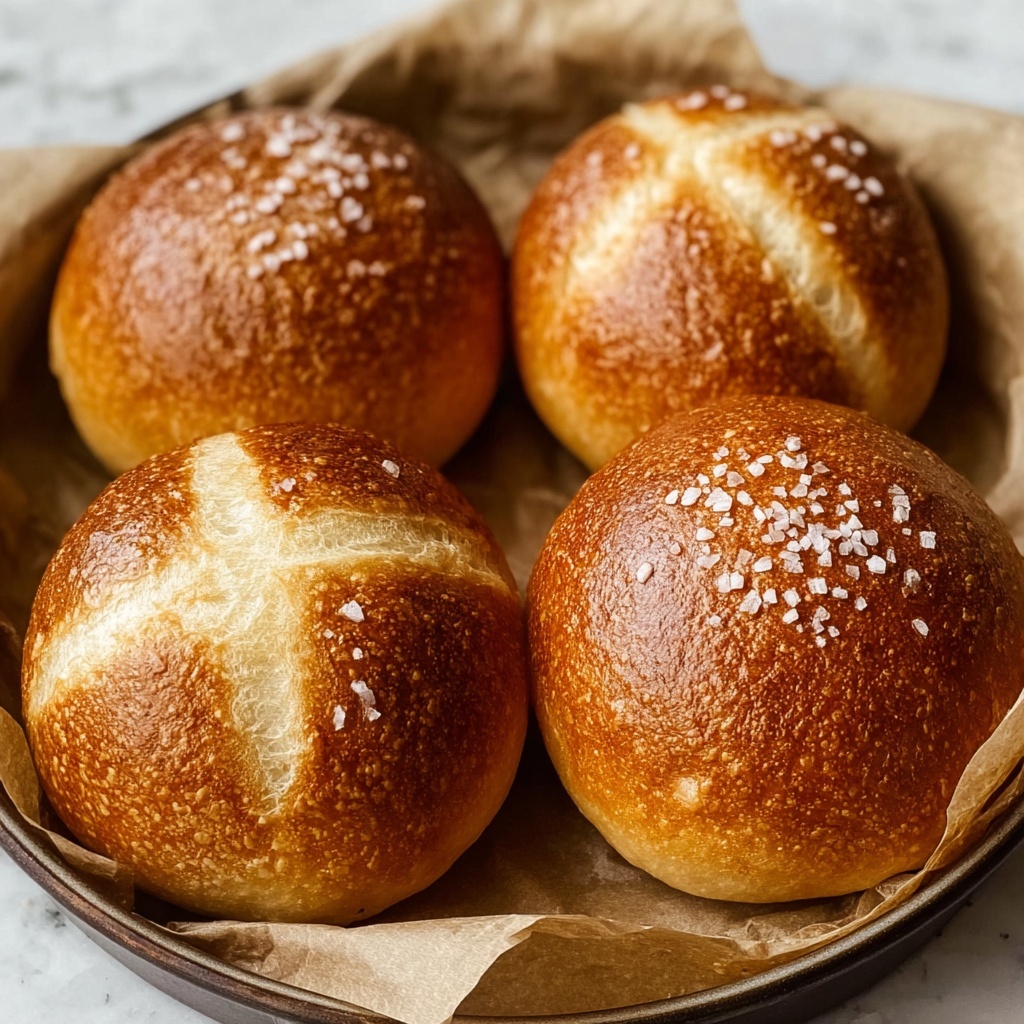
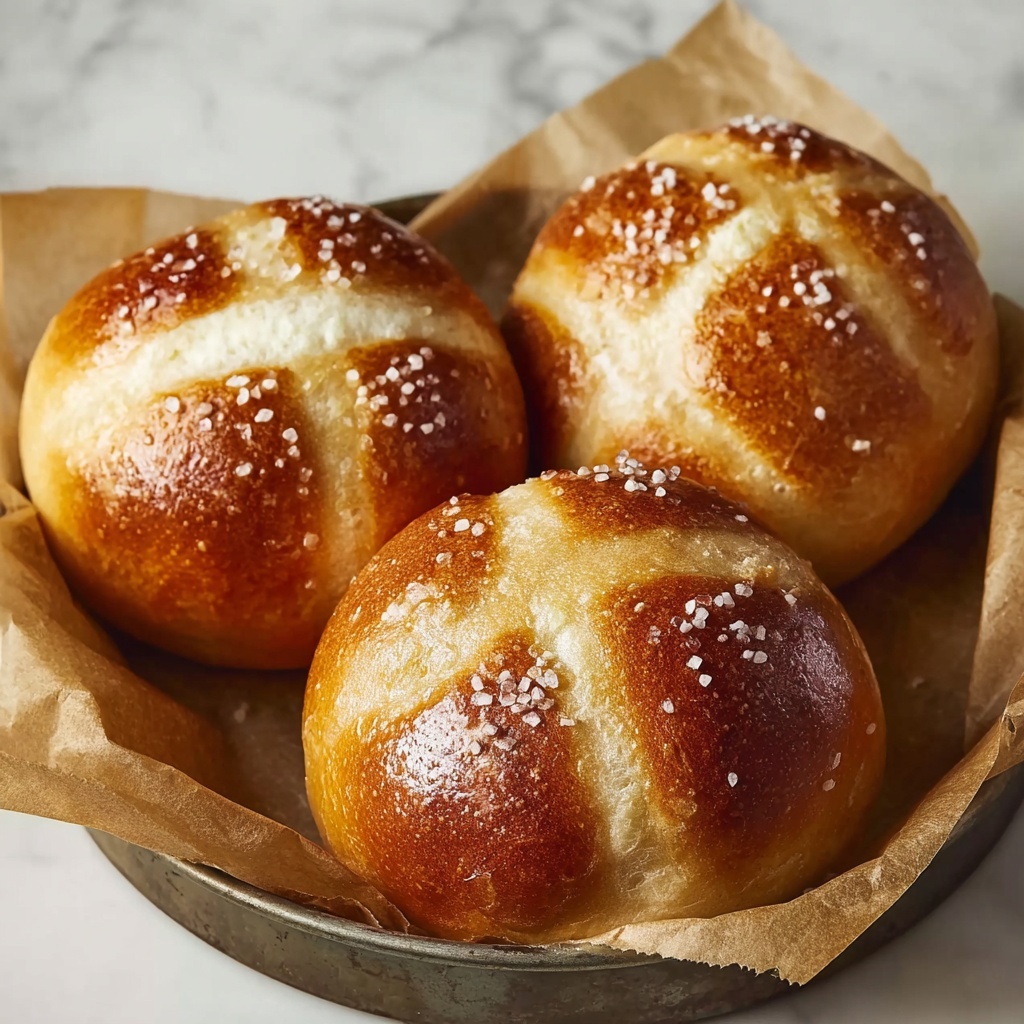
If you have ever dreamed of biting into soft, chewy bread with that unmistakable golden crust and rich, buttery aroma, then this Homemade Pretzel Buns: Soft, Chewy, and Irresistibly Delicious Recipe is exactly what you need. These buns are a delightful twist on classic pretzels, combining an addictively tender crumb with a satisfyingly chewy bite, perfectly browned crust, and that subtle hint of sweetness and saltiness that makes pretzels so irresistible. Whether you’re planning to elevate a burger night or simply crave a special bread treat, this recipe will quickly become a treasured favorite in your kitchen.
Ingredients You’ll Need
These ingredients are surprisingly straightforward yet crucial for creating the perfect balance of texture, flavor, and color in your homemade pretzel buns. Each plays a key role—from the chewy foundation to the glossy dark crust that everyone loves.
- Bread flour (3.5 cups): Essential for that chewy texture; don’t substitute with all-purpose flour.
- Salt (1.5 teaspoons): Enhances flavor, adding balance to the sweetness.
- Instant dry yeast (2 teaspoons): Ensures a good rise without the need for proofing.
- Warm water (0.5 cup): Activates the yeast effectively for proper dough development.
- Milk (0.5 cup): Adds richness; feel free to use non-dairy alternatives if desired.
- Honey (1 tablespoon): A touch of sweetness that helps the dough rise beautifully.
- Unsalted butter (2.5 tablespoons): Room temperature butter blends easily into the dough and creates a soft, tender crumb.
- Water (2 quarts): Provides the base for the alkaline bath, critical for that signature pretzel crust.
- Baking soda (6 tablespoons): This is the secret ingredient that creates that beloved pretzel crust and deep color.
How to Make Homemade Pretzel Buns: Soft, Chewy, and Irresistibly Delicious Recipe
Step 1: Combine the Dough Ingredients
Start by mixing bread flour, salt, instant dry yeast, warm water, milk, and honey in a large bowl. Using an electric mixer on low speed for about 3 to 4 minutes will bring all these into a cohesive dough. This step begins to develop both the structure and sweetness that are foundational to your pretzel buns.
Step 2: Incorporate Butter for Richness
Gradually add your room temperature unsalted butter into the dough. Kneading on low speed until the butter fully incorporates ensures a silky texture and adds that richness that will make these buns so irresistible.
Step 3: Knead Until Smooth and Elastic
Turn your mixer up to medium-high speed and knead for 8 to 10 minutes until the dough becomes smooth and elastic. It should pass the windowpane test, meaning you can stretch a small piece of dough thin without it tearing. This signals perfect gluten development, essential for that chewy bite.
Step 4: First Rest and Shaping
Lightly oil a straight-sided container and place your dough ball inside, turning to coat it with oil. Cover and rest at room temperature for 10 to 20 minutes. This allows the dough to relax before the slow fermentation that develops flavor.
Step 5: Cold Fermentation
Pop the covered dough into the refrigerator for 8 to 12 hours. This slow fermentation step deepens the flavor and improves the texture, turning your buns into something truly next level.
Step 6: Bring Dough to Room Temperature and Shape Buns
Remove your dough and let it sit at room temperature for about 45 to 60 minutes to warm up and relax. Then, shape it into a square and cut into 8 equal pieces. Roll each piece into a tight ball, creating tension by stretching and folding the dough underneath. Place them seam side down for a smooth top.
Step 7: Final Rise
Cover the dough balls with a damp paper towel and let them rest for 30 minutes until they puff up by about 50%. This final rise will ensure your buns bake up light rather than dense.
Step 8: Prepare the Oven and Alkaline Bath
Preheat your oven to 400°F (204°C) and line a baking sheet with parchment paper. Bring 2 quarts of water and 6 tablespoons of baking soda to a rolling boil in a large pot. This alkaline bath is the magic behind the pretzel’s signature crust.
Step 9: Boil the Buns for Crust
Carefully lower each dough ball into the boiling baking soda solution for 30 seconds on each side. This step creates that classic deep brown color and slightly crisp crust that sets these buns apart from ordinary rolls.
Step 10: Score and Bake
After boiling, place buns on your prepared baking sheet. Using a razor blade or sharp knife, cut a large X about ⅛ to ¼ inch deep on the top of each bun. This scoring allows the buns to expand beautifully in the oven. Bake for 16 to 19 minutes until they are a stunning deep brown.
Step 11: Cool and Enjoy
Remove the buns from the oven and let them cool completely before using or storing. You’ll be rewarded with buns that are soft and chewy on the inside, with a perfectly textured crust that’s golden and rich in flavor.
How to Serve Homemade Pretzel Buns: Soft, Chewy, and Irresistibly Delicious Recipe
Garnishes
Sprinkle coarse sea salt or pretzel salt on top of your buns before baking for that classic touch. You can also brush melted butter after baking for extra richness and shine — it’s a simple step that elevates the flavor and mouthfeel.
Side Dishes
These buns shine alongside hearty sides like loaded potato salad or a crisp green salad with tangy vinaigrette. They also pair beautifully with soups and stews, absorbing flavors while adding a chewy, satisfying partner to your meal.
Creative Ways to Present
Use these pretzel buns as the base for gourmet sandwiches—think smoked meats with tangy mustard or creamy cheese with pickled veggies. They also make fantastic sliders for game day or party platters. Their incredible texture makes every bit of filling pop with flavor.
Make Ahead and Storage
Storing Leftovers
Store any leftover pretzel buns in an airtight container at room temperature for up to two days. This keeps their texture intact and the crust fresh enough to enjoy later without losing that classic chew.
Freezing
If you want to keep your buns longer, freeze them after they have fully cooled. Wrap each bun tightly in plastic wrap and then place into a freezer-safe bag or container. They can be frozen for up to three months without significant loss of quality.
Reheating
For reheating, thaw frozen buns at room temperature, then warm them in a 300°F (150°C) oven for about 5 to 8 minutes. This helps restore their soft, chewy texture with a lightly crisp crust, almost like freshly baked.
FAQs
Can I use all-purpose flour instead of bread flour?
Bread flour is recommended because it has a higher protein content, which develops the gluten needed for the chewy texture of pretzel buns. Using all-purpose flour will soften the chewiness and may result in a denser bun.
Why do I boil the buns in baking soda water?
The alkaline bath created by boiling the buns in water mixed with baking soda gives pretzel buns their iconic dark brown crust and slightly tangy flavor. It also helps create a firmer crust that contrasts beautifully with the soft crumb inside.
Can I make the dough without refrigeration?
While it is possible, refrigerating the dough for 8 to 12 hours greatly improves flavor development and texture by slowing fermentation. Skipping this step might result in less complex flavor and a different crumb structure.
How do I know when the dough has risen enough?
The dough balls should increase in size by about 50% during the final rise. Gently pressing your finger into the dough should leave a slight indentation that slowly springs back, signaling proper fermentation.
Can I add toppings other than salt?
Absolutely! You can experiment with sesame seeds, poppy seeds, or even grated cheese before baking to add extra flavor and visual appeal. Just apply toppings after boiling and before placing the buns in the oven.
Final Thoughts
Now that you’ve got the full scoop on this Homemade Pretzel Buns: Soft, Chewy, and Irresistibly Delicious Recipe, I can promise it will become a baker’s favorite around your kitchen. The combination of simple ingredients transformed through patient technique delivers buns that are not just bread, but a real celebration of texture and flavor. Give it a try and watch everyone fall in love with these soft, chewy masterpieces!
“`
Print
Homemade Pretzel Buns: Soft, Chewy, and Irresistibly Delicious Recipe
- Prep Time: 20 minutes active + 8-12 hours fermentation
- Cook Time: 19 minutes baking + 1 minute boiling
- Total Time: 12 hours 39 minutes
- Yield: 8 buns
- Category: Bread
- Method: Baking
- Cuisine: American
Description
Learn how to make homemade pretzel buns that are soft, chewy, and irresistibly delicious. These buns feature a classic pretzel crust achieved by boiling in a baking soda solution before baking to golden perfection, perfect for sandwiches or burgers with a rich, slightly sweet flavor and satisfying texture.
Ingredients
Dough Ingredients
- 3.5 cups bread flour
- 1.5 teaspoons salt
- 2 teaspoons instant dry yeast
- 0.5 cup warm water
- 0.5 cup milk
- 1 tablespoon honey
- 2.5 tablespoons unsalted butter, room temperature
Boiling Solution
- 2 quarts water
- 6 tablespoons baking soda
Instructions
- Mix Dough: In a large bowl, combine the bread flour, salt, yeast, warm water, milk, and honey. Using an electric mixer on low speed, mix for 3-4 minutes until a cohesive dough forms.
- Add Butter: Gradually incorporate the room temperature unsalted butter into the dough while kneading on low speed until fully integrated, adding richness and improving texture.
- Knead Dough: Increase mixer speed to medium-high and knead for 8-10 minutes until the dough is smooth, soft, and passes the windowpane test without tearing.
- Initial Rest: Lightly spray a straight-sided container with oil, roll the dough into a ball, place it inside, turn to coat with oil, cover, and let rest at room temperature for 10-20 minutes.
- Cold Fermentation: Cover and refrigerate the dough for 8-12 hours to slow fermentation and develop flavor.
- Warm Dough: Remove dough from refrigerator and let it sit at room temperature for 45-60 minutes to relax and rise slightly.
- Shape Buns: Remove dough from container and shape it into a square. Divide into 8 equal pieces, then roll each piece into a tight ball with tension and place seam-side down.
- Final Proof: Cover dough balls with a damp paper towel and let them rise for about 30 minutes until increased in size by about 50%.
- Preheat Oven: Preheat oven to 400°F (204°C) and line a baking sheet with parchment paper.
- Boil Buns: Bring 2 quarts of water and 6 tablespoons of baking soda to a rolling boil in a large pot. Carefully drop buns into the boiling solution and boil for 30 seconds on each side.
- Score Buns: Using a razor blade or sharp knife, score a large X on top of each bun, cutting ⅛ to ¼ inch deep to allow expansion while baking.
- Bake Buns: Transfer boiled buns to the prepared baking sheet and bake for 16-19 minutes, until deep brown and crusty.
- Cool: Remove buns from oven and allow to cool completely on a wire rack.
- Store: Store cooled buns in an airtight container at room temperature for up to 2 days to maintain freshness.
Notes
- Use bread flour for the ideal chewy texture; all-purpose flour will not yield the same result.
- Warm water activates the yeast better, helping dough rise.
- If desired, substitute non-dairy milk to make recipe dairy-free.
- Boiling the dough in baking soda solution is essential for the characteristic pretzel crust and flavor.
- The scoring (X cut) on top helps buns expand properly without cracking in unwanted ways.
- Allow buns to cool completely before storing to prevent sogginess.
- These buns are best eaten within 2 days or can be frozen for longer storage.

