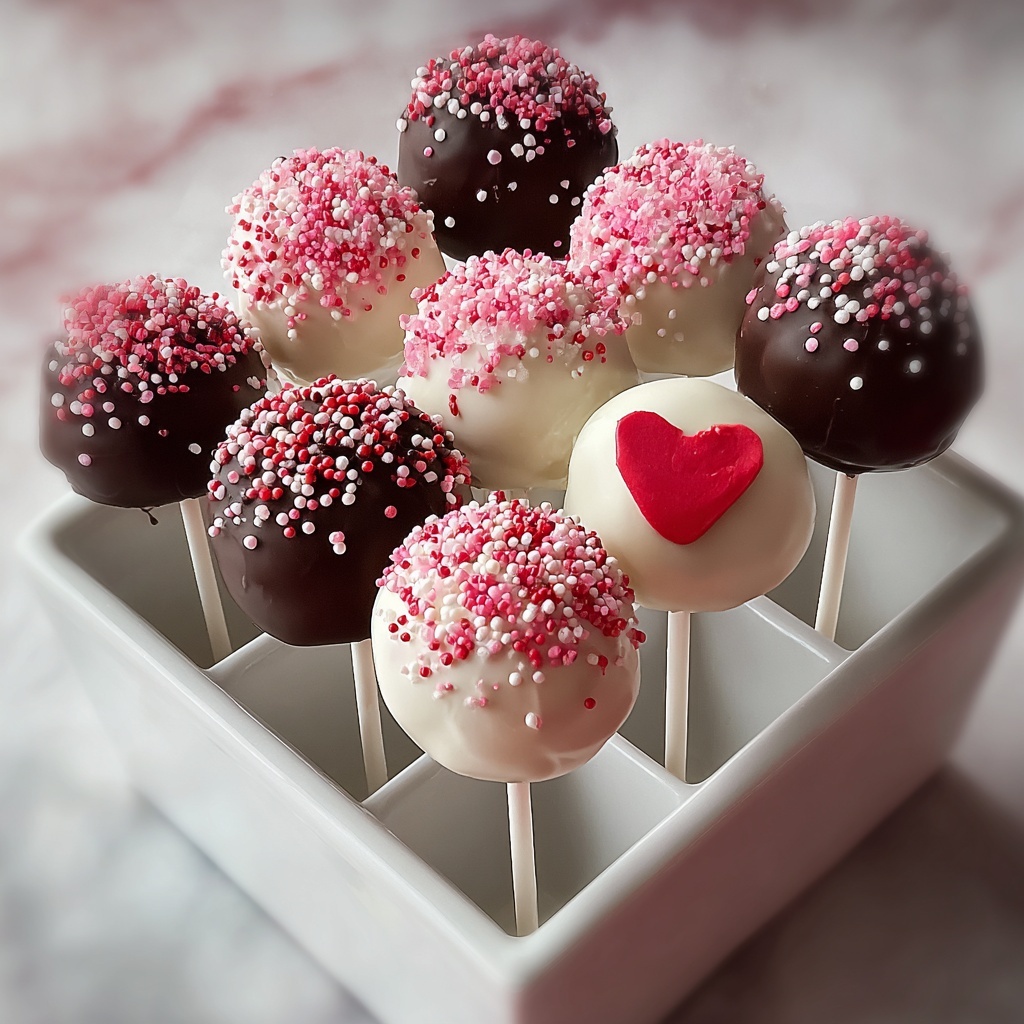
If you’re looking to add a touch of sweetness and charm to your next celebration, this Romantic Cake Pops Recipe is an absolute must-try. These little treats combine moist cake with smooth, luscious chocolate coating to create bite-sized moments of pure joy. Whether you’re preparing for a Valentine’s Day party, an anniversary, or simply want to surprise someone special, this recipe delivers effortless elegance and undeniable flavor in every pop. Let’s dive into the magic that makes these cake pops a beloved classic.
Ingredients You’ll Need
Making these Romantic Cake Pops Recipe calls for simple, pantry-friendly ingredients that come together beautifully. Each item plays a crucial role: from the base cake providing moistness and flavor, to the frosting binding the crumbs, to the candy melts giving that luscious, glossy finish. These ingredients are easy to find but essential for the perfect texture, taste, and visual wow factor.
- 1 box cake mix (any flavor): Choose your favorite for the base, like red velvet or chocolate for romantic vibes.
- Ingredients required on box: Usually eggs, oil, and water; follow the package to bake a perfect cake.
- 1/2 cup frosting (store-bought or homemade): This binds the cake crumbs; matching the cake flavor enhances harmony.
- 12–15 oz white or dark chocolate melting wafers or candy melts: For coating the cake pops with a smooth, glossy shell.
- Sprinkles, edible glitter, or drizzle (optional): Adds a stunning decorative touch to personalize your cake pops.
- Lollipop sticks: Essential for easy handling and presentation.
- Styrofoam block or cake pop stand: Keeps the pops upright while the chocolate sets perfectly.
How to Make Romantic Cake Pops Recipe
Step 1: Bake and Crumble the Cake
Start by baking your selected cake mix exactly according to the package instructions. Once it’s out of the oven, allow it to cool completely — this is key for handling and texture. Then, crumble the cake into fine crumbs using your hands or a fork; aim for a consistent texture that will blend smoothly with the frosting in the next step.
Step 2: Mix Frosting Into Cake Crumbs
Add half a cup of frosting gradually to the cake crumbs, mixing with clean hands after each spoonful. The goal is a dough-like consistency that holds together but isn’t soggy. This binder will ensure your cake pops keep their shape through dipping and decoration, making every bite perfectly moist and compact.
Step 3: Form Cake Balls and Chill
Using your fingers or a small scoop, roll the mixture into 1-inch balls. Place them on a parchment-lined baking sheet and pop them into the freezer for 15 to 20 minutes. Chilling firms up the cake balls so they won’t crumble or break apart when you add the sticks and dip them in chocolate later.
Step 4: Melt Chocolate for Dipping
While the cake balls chill, melt your choice of white or dark chocolate wafers according to the package directions. Make sure the chocolate is smooth and slightly cooled so it coats evenly without melting the cake ball too much once dipped.
Step 5: Insert Sticks and Dip Pops
Dip one end of each lollipop stick into the melted chocolate, then insert it halfway into a chilled cake ball—this trick keeps the stick firmly in place. Next, dip the entire cake pop into the chocolate, turning to coat fully and shaking off excess gently. This creates the classic, glossy outer shell that’s both beautiful and delicious.
Step 6: Decorate and Set the Cake Pops
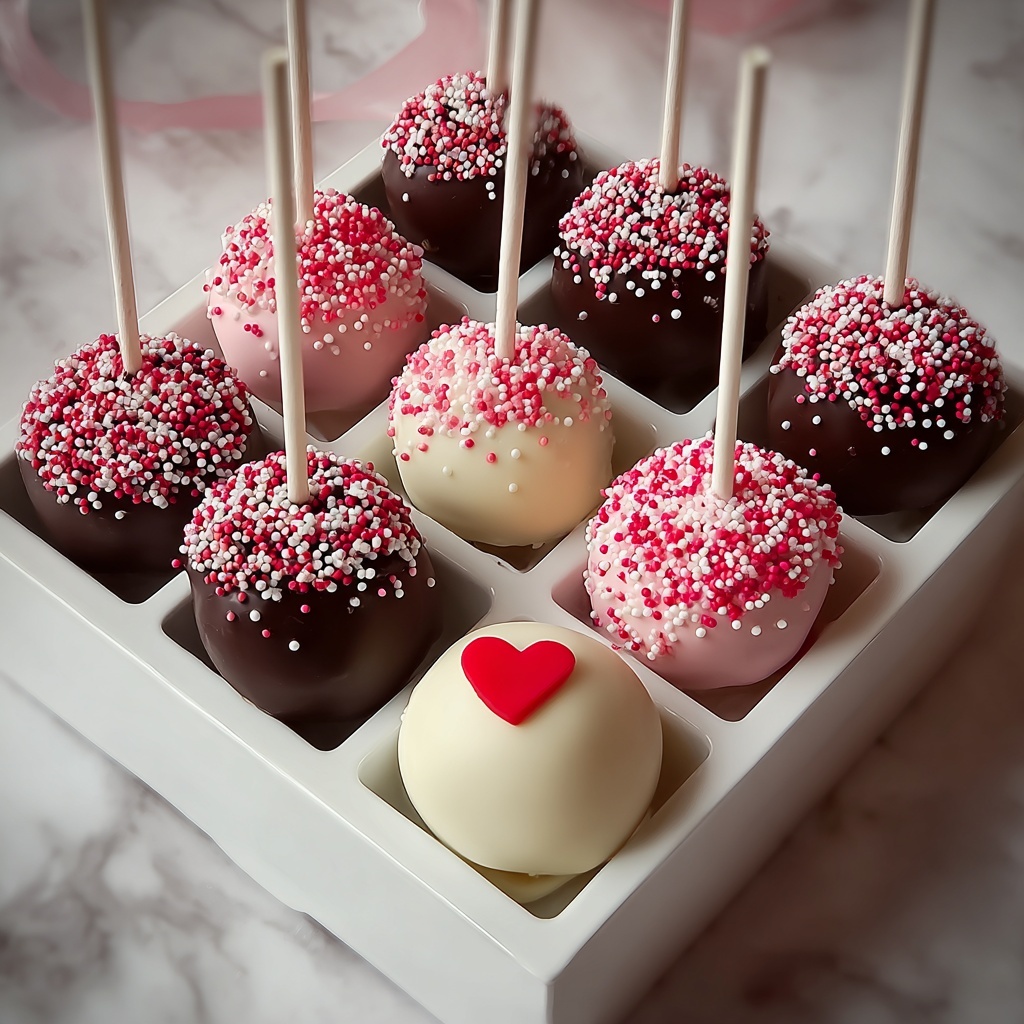
Before the chocolate hardens, sprinkle on edible glitter, colorful sprinkles, pearls, or drizzle with contrasting chocolate for that romantic finishing touch. Then, stick each completed cake pop upright in a Styrofoam block or cake pop stand. Let them cool completely so the coating sets into a firm shell ready for serving or gifting.
How to Serve Romantic Cake Pops Recipe

Garnishes
Garnishes not only dress up your Romantic Cake Pops but turn them into works of edible art. Think shimmering edible glitter for sparkle, delicate pearls for elegance, or heart-shaped sprinkles to play up the romance. These little accents bring added texture and visual delight, making each pop an irresistible treat.
Side Dishes
Serve your cake pops alongside light, complementary offerings such as fresh berries, whipped cream, or a small cup of rich hot chocolate. These sides balance sweetness beautifully and turn your gathering into a well-rounded dessert experience that guests will adore.
Creative Ways to Present
Elevate the presentation by arranging the Romantic Cake Pops in mason jars filled with colored sugar or edible confetti. Wrapping each pop in cellophane with a pretty ribbon also makes charming party favors. For Valentine’s Day or anniversaries, themed cupcake stands or heart-decorated platters bring a festive vibe that’s impossible to resist.
Make Ahead and Storage
Storing Leftovers
Romantic Cake Pops keep well at room temperature for up to two days if covered to prevent drying out. For longer storage, place them in an airtight container in the refrigerator, where they will stay fresh for up to five days. Bringing refrigerated pops to room temperature before serving gives the best texture.
Freezing
If you want to prepare in advance, freeze the cake pops after they are dipped and decorated. Wrap each individually in plastic wrap and store them in an airtight container. They can last in the freezer for up to one month. Thaw them overnight in the refrigerator before serving to maintain their perfect consistency.
Reheating
Since cake pops are best enjoyed at room temperature, avoid microwaving to prevent melting the chocolate shell. Instead, let them sit on the counter for an hour or so after refrigeration or freezing. This gentle warming allows the cake to soften up without compromising the beautiful coating.
FAQs
Can I use homemade cake instead of a box mix?
Absolutely! Homemade cake works wonderfully in this Romantic Cake Pops Recipe. Just make sure it’s completely cooled and crumbly enough to mix well with frosting.
What’s the best way to get smooth chocolate coating?
Melting your candy melts or chocolate slowly and evenly, ideally using a double boiler or microwave in short bursts, will help you achieve a smooth, glossy finish without clumps.
How long do cake pops last once decorated?
When stored properly, cake pops last up to two days at room temperature or up to five days in the refrigerator. Just be sure they’re kept in an airtight container to prevent drying out.
Can I use other frostings besides the matching flavor?
Yes, you can experiment with different frostings for unique flavor combinations, but matching frosting generally provides the most balanced taste and texture.
What’s a good cake flavor for a romantic theme?
Red velvet, strawberry, or classic chocolate paired with pink, white, or red decorations add a lovely romantic touch that’s perfect for celebrations like Valentine’s Day.
Final Thoughts
If you love a delightful, personal touch with your desserts, this Romantic Cake Pops Recipe is a joy to make and share. The combination of moist cake, creamy frosting, and rich chocolate coating brings smiles with every bite. Whether you’re making them for a special occasion or just because, these cake pops will add a dash of sweetness and love to your day. Go ahead, try this recipe and watch it become one of your most cherished treats!
Print
Romantic Cake Pops Recipe
- Prep Time: 30 minutes
- Cook Time: 25 minutes
- Total Time: 1 hour 15 minutes
- Yield: 24–30 cake pops
- Category: Dessert
- Method: Baking
- Cuisine: American
- Diet: Vegetarian
Description
Romantic Cake Pops are delightful bite-sized treats perfect for Valentine’s Day or any special occasion. These chocolate-covered cake balls on a stick combine moist cake crumbs with creamy frosting, dipped in rich chocolate and decorated with sprinkles or edible glitter, making them both visually appealing and deliciously indulgent.
Ingredients
Cake and Frosting
- 1 box cake mix (any flavor) + ingredients required on box
- 1/2 cup frosting (store-bought or homemade, matching cake flavor)
Decoration and Assembly
- 12–15 oz white or dark chocolate melting wafers or candy melts
- Sprinkles, edible glitter, or drizzle for decoration (optional)
- Lollipop sticks
- Styrofoam block or cake pop stand (for drying)
Instructions
- Bake the Cake: Preheat your oven and bake the cake according to the package instructions detailed on the cake mix box. After baking, remove the cake from the oven and allow it to cool completely on a wire rack to ensure it firms up for crumbling.
- Prepare Cake Mixture: Once cooled, crumble the cake into a large bowl using your hands or a fork until the crumbs are very fine and evenly textured. Add frosting gradually, one spoonful at a time, mixing with clean hands until the mixture holds together firmly like dough but is not soggy.
- Shape Cake Pops: Scoop out portions of the cake mixture and roll each into approximately 1-inch balls with your hands. Place the rolled balls on a baking sheet lined with parchment paper to prevent sticking, then chill them in the freezer for 15–20 minutes to firm up before dipping.
- Melt Chocolate: Melt the white or dark chocolate melting wafers according to the package instructions, using either a microwave in short intervals or a double boiler, stirring until smooth and glossy.
- Insert Lollipop Sticks: Dip one end of each lollipop stick into the melted chocolate, then carefully insert it halfway into each chilled cake ball. This step helps secure the stick firmly inside the cake pop.
- Coat Cake Pops: Fully dip each cake pop into the melted chocolate, making sure it is evenly coated. Gently tap or swirl to allow excess chocolate to drip off, ensuring a smooth finish.
- Decorate: Immediately decorate the coated cake pops with sprinkles, edible pearls, or drizzle with contrasting chocolate while the coating is still wet so decorations stick properly.
- Set Cake Pops: Place each finished cake pop upright into a Styrofoam block or a dedicated cake pop stand to set and harden. Allow them to cool completely at room temperature until the chocolate shell is firm before serving or packaging.
Notes
- Use red velvet, strawberry, or chocolate cake flavors paired with pink or white decorations to enhance the romantic theme.
- Wrap individual cake pops in cellophane bags tied with ribbon to create charming gifts or party favors.
- Store cake pops at room temperature for up to 2 days or refrigerate for up to 5 days to maintain freshness.
