
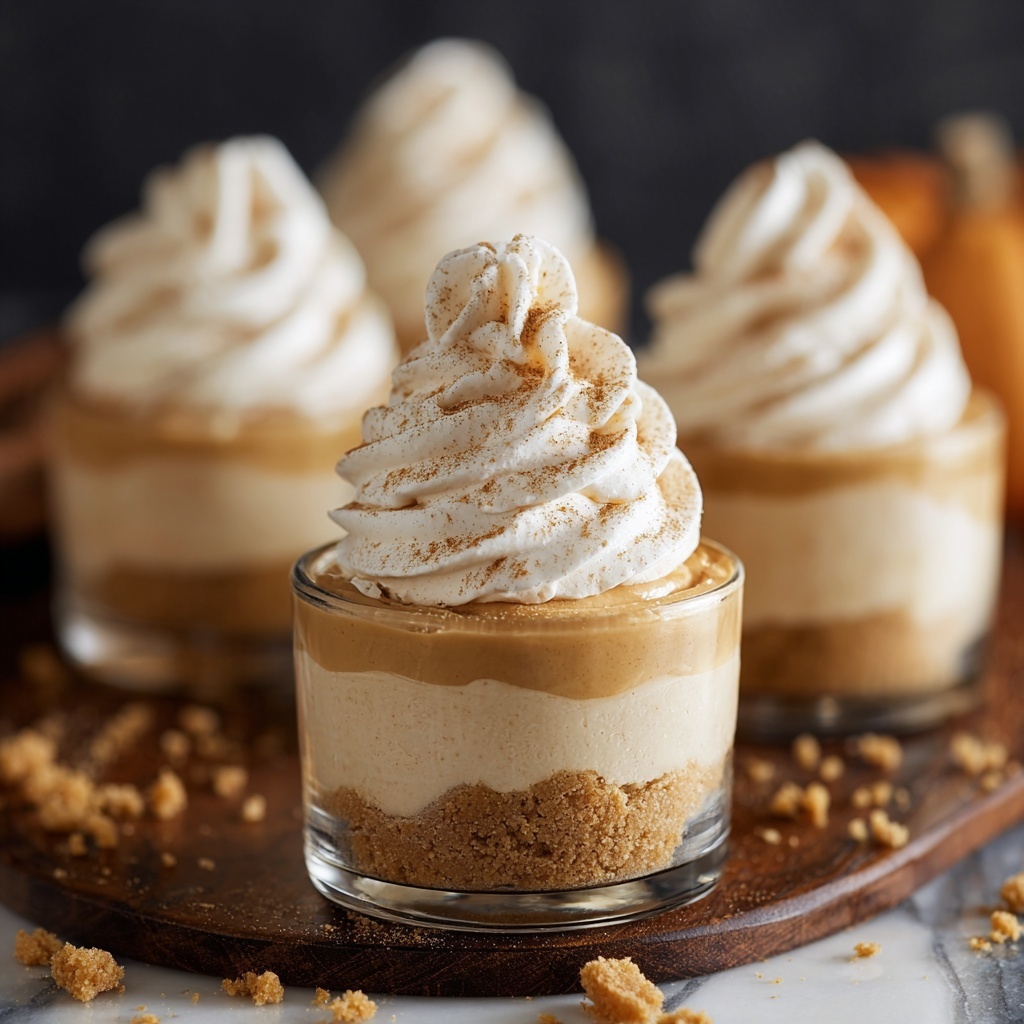
If you’re craving a dessert that captures all the cozy flavors of autumn in a perfectly sized, fuss-free treat, then this No-Bake Mini Pumpkin Cheesecakes Recipe is exactly what you need. Imagine velvety smooth pumpkin-infused cheesecake filling nestled atop a buttery, spiced graham cracker crust, all in adorable little cups that are as fun to eat as they are to make. These mini delights come together without an oven, making them a breeze for any season, and they truly celebrate the rich, comforting essence of pumpkin pie in a creamy, dreamy form. Whether you’re hosting a gathering or just treating yourself, these cheesecakes will become an instant favorite.
Ingredients You’ll Need
Gathering simple, quality ingredients is half the joy of making these mini cheesecakes. Each component plays its role perfectly— from the buttery crunch of the crust to the luscious pumpkin-spiced filling, every bite is a celebration of texture and taste.
- Graham crackers (1 sleeve, about 9 crackers): The base of your crust, providing that classic crunch and subtle sweetness.
- Butter (4 tablespoons, melted): Binds the crust together while adding richness.
- Granulated sugar (2 tablespoons): Sweetens and balances the crust’s flavor.
- Brown sugar (2 tablespoons): Adds warm molasses notes that complement the pumpkin.
- Cream cheese (1 8-ounce package, softened): The creamy backbone of your cheesecake filling.
- Pumpkin puree (1 15-ounce can): Brings the signature pumpkin flavor and moist texture.
- Pumpkin pie spice (3 teaspoons): Infuses the filling with cozy spices like cinnamon and nutmeg.
- Sugar-free cheesecake-flavored instant pudding mix (1 1-ounce package or 1/3 regular package): Adds that unmistakable cheesecake taste with a silky texture.
- Sweetened condensed milk (1 14-ounce can): Sweetens and enriches the filling for mousse-like smoothness.
- Frozen whipped topping (1 12-ounce container) or 4–5 cups real whipped cream: Lightens the filling and makes it heavenly fluffy.
- Additional whipped topping (optional): For garnish and extra indulgence.
How to Make No-Bake Mini Pumpkin Cheesecakes Recipe
Step 1: Create the Perfect Crust
Start by pulsing the graham crackers in a food processor until they turn into fine crumbs that will form the base of your mini cheesecakes. Mix in the melted butter along with both sugars to add a touch of sweetness and stickiness that holds the crust together. Press this mixture firmly into individual 9-ounce cups to create that satisfying, crunchy foundation. Pop these crusts into the fridge to chill, letting them firm up while you whip up the luscious filling.
Step 2: Whip the Cream Cheese Filling
Grab your stand mixer and beat the softened cream cheese until it’s ultra smooth—this step ensures a dreamy, lump-free cheesecake base. Then, add in the pumpkin puree, pumpkin pie spice, and instant cheesecake-flavored pudding mix, which works wonders in giving the filling both flavor and structure. Mix until everything is beautifully combined, scraping down the bowl to make sure it’s all evenly blended.
Step 3: Sweeten and Lighten
Next, pour in the sweetened condensed milk for a rich sweetness that melts into the pumpkin flavor perfectly. Beat this mixture again until it’s smooth. Switch to your whisk attachment and gently fold in the frozen whipped topping or real whipped cream, which gives the filling a wonderfully airy texture that’s light and fluffy, elevating your mini cheesecakes to pure delightfulness.
Step 4: Chill the Filling
Refrigerate the filling for about an hour, which helps it set to that perfect cheesecake consistency. Once chilled, spoon or pipe the filling over the prepared crusts in your cups. This step is not only satisfying to do but also sets the stage for a gorgeous presentation.
Step 5: Final Touches Before Serving
Top off each mini cheesecake with an extra dollop of whipped topping and a sprinkle of pumpkin pie spice or a few graham cracker crumbs for a little crunch and visual appeal. These finishing touches make your desserts look just as good as they taste, tempting everyone to dive right in.
How to Serve No-Bake Mini Pumpkin Cheesecakes Recipe
Garnishes
To really make your No-Bake Mini Pumpkin Cheesecakes Recipe shine, consider garnishing with toasted pecans, a dusting of cinnamon or nutmeg, or even a drizzle of caramel sauce. These simple extras add crunch, spice, and sweetness that elevate each bite. It’s all about layering flavors and textures to create an unforgettable dessert experience that looks as delightful as it tastes.
Side Dishes
These mini cheesecakes pair beautifully with light beverages such as a spiced chai latte, hot apple cider, or a simple cup of good black coffee. Their creamy and sweet richness balances well with these warm, aromatic drinks, making your dessert break feel indulgent yet perfectly balanced. Fresh berries or a tangy orange salad can also provide a refreshing contrast if you want to serve something alongside your cheesecakes.
Creative Ways to Present
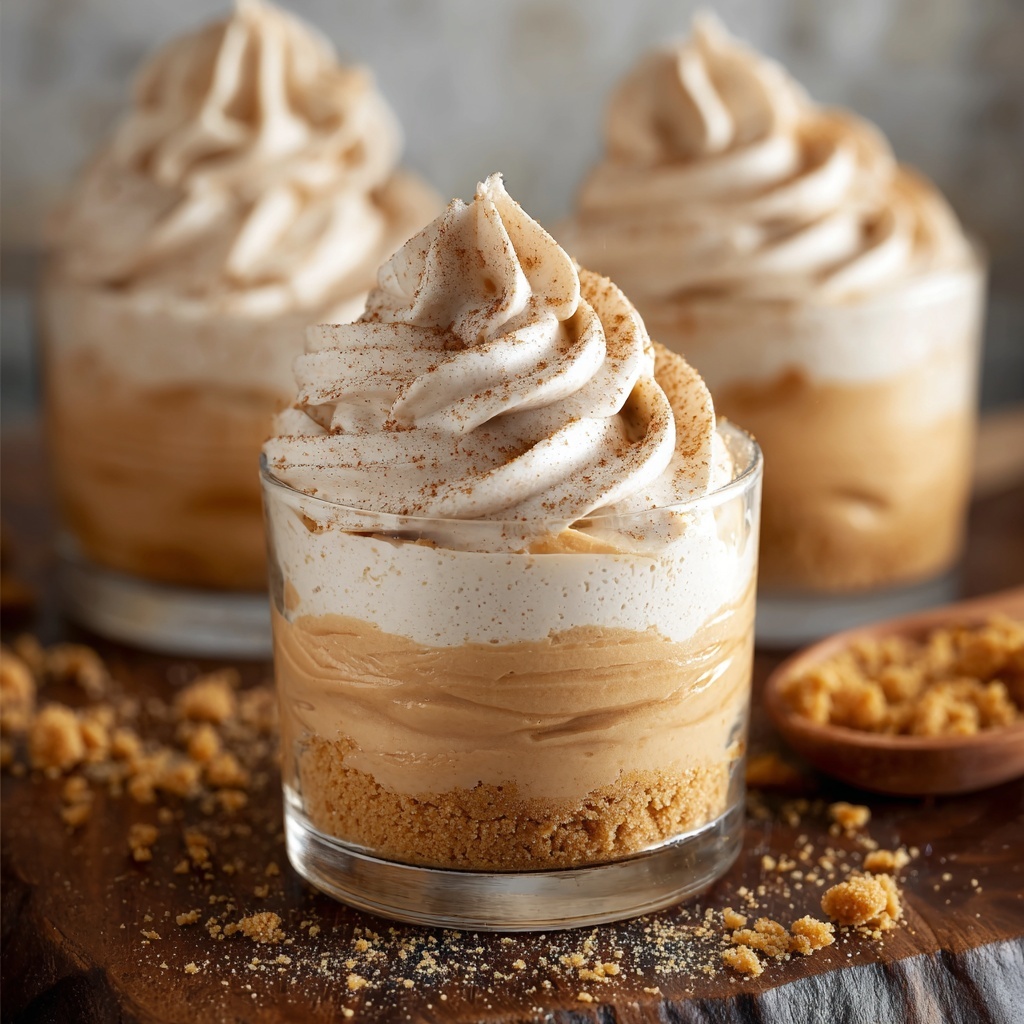
If you’re looking to impress guests or just want to add some charm, serve your cheesecakes in pretty glass jars or vintage teacups. Layer the filling and crust with additional pumpkin puree or a smear of dulce de leche between layers for a surprise element. Mini spoons tied with twine or festive fall-themed picks add a personal touch, turning your No-Bake Mini Pumpkin Cheesecakes Recipe into a true centerpiece for any gathering.
Make Ahead and Storage
Storing Leftovers
Leftover mini pumpkin cheesecakes should be stored covered in the refrigerator to maintain their creamy texture and fresh flavors. They’ll stay delicious and moist for up to 3 days, making them a convenient dessert to prepare in advance or enjoy as a sweet treat anytime.
Freezing
You can also freeze these cheesecakes for longer storage. Wrap each cup tightly with plastic wrap and place them in an airtight container or freezer bag. Frozen mini cheesecakes last up to 1 month. When ready to enjoy, thaw them in the fridge overnight for the best texture without losing any of that signature pumpkin cheesecake goodness.
Reheating
Since these cheesecakes are best served chilled, reheating isn’t necessary. However, if you prefer slightly softer textures, simply let them sit at room temperature for 15 to 20 minutes before serving. This little step wakes up the flavors without compromising their creamy charm.
FAQs
Can I use fresh pumpkin instead of canned pumpkin puree?
Fresh pumpkin can work, but it needs to be cooked and pureed until very smooth beforehand. Canned pumpkin puree is more consistent in texture and moisture, which helps keep the cheesecake filling silky and stable.
Is it necessary to use sugar-free cheesecake pudding mix?
Not at all! Using regular cheesecake pudding mix works well too—just use one-third of the package as the recipe calls for. The pudding mix is key to setting the filling without baking, so don’t skip it.
Can I make these pumpkin cheesecakes vegan or dairy-free?
With some clever substitutions like dairy-free cream cheese, non-dairy whipped topping, and vegan graham crackers, you can make a vegan version. Just keep in mind that texture and flavor may vary slightly.
How long do these cheesecakes need to chill before serving?
The filling needs at least 1 hour to chill and set properly, but they’re even better if refrigerated for several hours or overnight. This makes the flavors meld beautifully and strengthens the texture.
What’s the best way to transport these mini cheesecakes for a party?
Keep them in their individual cups and arrange them securely in a container with a lid, placing a layer of parchment paper between tiers if stacking. Keep them refrigerated until just before serving and carry them in a cooler if traveling far.
Final Thoughts
Trust me, once you try this No-Bake Mini Pumpkin Cheesecakes Recipe, it will become your go-to for fall gatherings, clever weeknight desserts, or whenever you’re craving a sweet, spiced treat that’s effortless to make and impossible to resist. The combination of creamy pumpkin filling with a crunchy crust feels like a warm hug in dessert form. So go ahead and give these mini beauties a shot — your taste buds will thank you!
Print
No-Bake Mini Pumpkin Cheesecakes Recipe
- Prep Time: 20 minutes
- Cook Time: 0 minutes
- Total Time: 1 hour 20 minutes
- Yield: 10 servings
- Category: Dessert
- Method: No-Cook
- Cuisine: American
Description
These No-Bake Mini Pumpkin Cheesecakes are creamy, spiced treats perfect for fall or any time you crave a decadent yet easy dessert. Featuring a buttery graham cracker crust topped with a luscious pumpkin-flavored cheesecake filling, they require no oven and come together quickly with simple ingredients.
Ingredients
Crust
- 1 sleeve graham crackers (about 9 crackers)
- 4 tablespoons butter, melted
- 2 tablespoons granulated sugar
- 2 tablespoons brown sugar
Filling
- 1 (8-ounce) package cream cheese, softened
- 1 (15-ounce) can pumpkin puree
- 3 teaspoons pumpkin pie spice
- 1 (1-ounce) package sugar-free cheesecake-flavored instant pudding mix (or 1/3 regular package)
- 1 (14-ounce) can sweetened condensed milk
- 1 (12-ounce) container frozen whipped topping (or 4–5 cups real whipped cream)
Garnish (optional)
- Additional whipped topping
- Sprinkle of pumpkin spice or graham cracker crumbs
Instructions
- Prepare the crust: Pulse graham crackers in a food processor until finely crushed. Add melted butter, granulated sugar, and brown sugar, then pulse again to combine the mixture evenly. Spoon the crust mixture into 9-ounce cups and gently press it down to form a firm base. Place the cups in the refrigerator to chill while making the filling.
- Make the cheesecake filling: Using a stand mixer, beat the softened cream cheese on medium speed until smooth and creamy. Add the pumpkin puree, pumpkin pie spice, and cheesecake-flavored instant pudding mix, then continue beating until the ingredients are fully incorporated, scraping down the bowl as needed.
- Add remaining filling ingredients: Pour in the sweetened condensed milk and beat the mixture until smooth. Swap to the whisk attachment and gently fold in the frozen whipped topping until the filling is fluffy and well combined.
- Chill the filling: Place the filling in the refrigerator to chill for about 1 hour, allowing it to firm up for easier serving and better texture.
- Assemble the cheesecakes: Spoon or pipe the chilled filling over the prepared graham cracker crusts in each cup. Refrigerate the assembled mini cheesecakes until ready to serve, allowing them to set completely.
- Garnish and serve: Before serving, optionally top each mini cheesecake with additional whipped topping and sprinkle with pumpkin pie spice or crushed graham cracker crumbs for an extra decorative touch and flavor boost.
Notes
- Use real whipped cream for a richer flavor or frozen whipped topping as a convenient alternative.
- Ensure the cream cheese is softened to room temperature for a smooth filling without lumps.
- If you don’t have a food processor, graham crackers can be crushed in a sealed plastic bag using a rolling pin.
- These mini cheesecakes are best served chilled and can be stored covered in the refrigerator for up to 3 days.
- For a sugar-free version, opt for sugar-free graham crackers and sweetened condensed milk alternatives.
