If you’ve ever wondered how to nail that perfect flaky, tender pie crust that holds all your favorite fillings just right, then you’re in for a treat with Grandma’s Classic Pie Crust Recipe. This beloved recipe combines simple pantry staples in just the right way to deliver a buttery, melt-in-your-mouth crust that’s both sturdy and delightfully flaky. Whether you’re tackling an apple pie, cherry, or a savory quiche, this crust is a timeless foundation that feels like a warm hug from Grandma herself.
Ingredients You’ll Need
Getting this crust just right begins with basic ingredients that pack a punch in flavor and texture. Each component plays an important role in ensuring the dough’s perfect tenderness, flakiness, and ease of handling.
- 3 cups pastry flour (or all-purpose flour): Provides the structure and tender crumb essential for a flaky crust.
- 1/2 teaspoon salt: Enhances all the flavors and balances the richness of the fats.
- 1/2 cup shortening: Adds flakiness and helps the dough hold its shape during baking.
- 1/2 cup cold unsalted butter: Contributes deep, buttery flavor and delicate layers in the crust.
- 1/2 cup ice cold water: Binds the ingredients just right while keeping the dough cool to maintain flakiness.
- 1 tablespoon white vinegar: Helps tenderize the dough by slowing gluten formation for a softer crust.
How to Make Grandma’s Classic Pie Crust Recipe
Step 1: Mix the Dry Ingredients
Begin by sifting the pastry flour and salt into a large bowl. This ensures even distribution of salt and avoids any lumps, giving your dough a perfectly smooth texture from the start.
Step 2: Cut in the Fats
Next, add the shortening and cold unsalted butter to the dry ingredients. Use a pastry cutter, two knives, or your fingers to work the fats into the flour until the mixture looks like coarse crumbs—think pea-sized bits of butter scattered throughout. This is key to creating those flaky layers you dream of.
Step 3: Combine the Liquids
In a separate cup, mix together the ice cold water and white vinegar. Then, pour this liquid mixture gradually into the crumbly flour mixture. Stir gently with a fork or your hands just until the dough comes together. Avoid overmixing to keep the crust tender.
Step 4: Prepare for Rolling
Dust your countertop with a little flour to prevent sticking. Divide the dough into two equal discs, wrap them in plastic wrap, and let them chill in the refrigerator for at least 30 minutes if you have time—this makes rolling easier and helps the gluten relax.
Step 5: Roll Out the Dough
Take one chilled disc and roll it out on the floured surface to about one inch larger than your pie pan. This extra inch will help ensure your crust fits perfectly with some overhang to seal.
Step 6: Fit the Crust into the Pan
Gently transfer the rolled dough into your pie pan. Press lightly along the bottom and sides so the crust conforms to the pan’s shape without stretching, which can cause shrinking during baking.
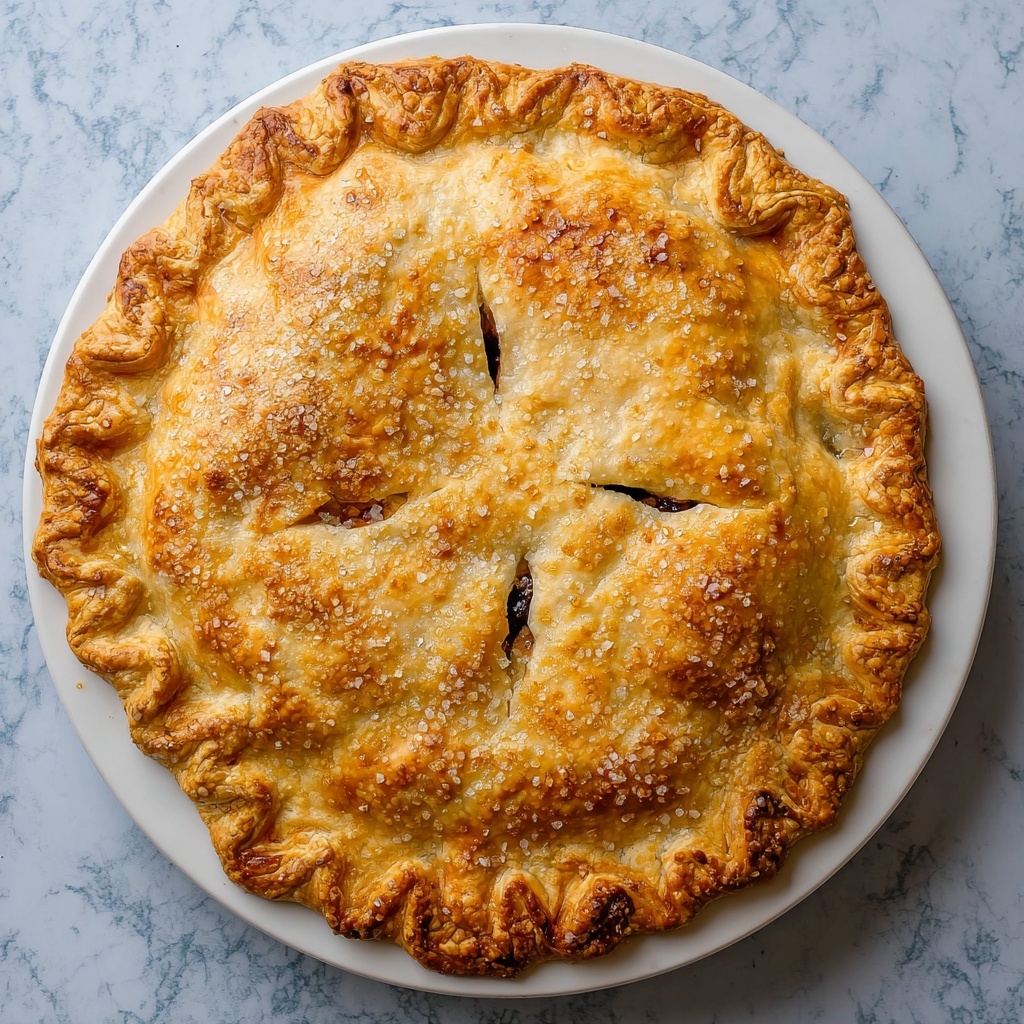
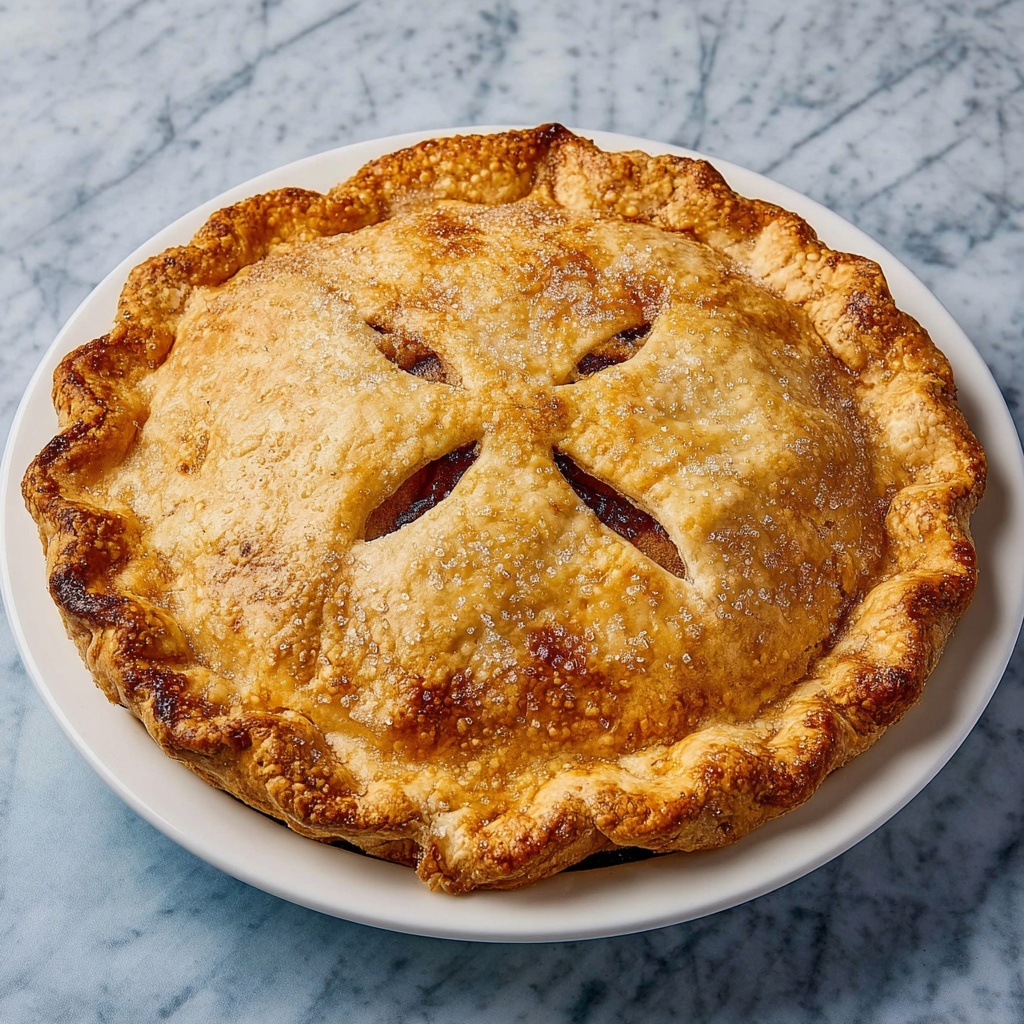
Step 7: Shape the Edges
If making a bottom-only crust, tuck the edges under and flute them with your thumbs for that classic hand-crafted look. For a double crust pie, you’ll add your filling now, then roll out the second disc to place on top, sealing and crimping the edges together to lock in all those delicious flavors.
Step 8: Vent the Top Crust
Before baking, use a fork or knife to poke vent holes in the top crust if you’re doing a double crust pie. This allows steam to escape during baking, preventing a soggy crust and ensuring an even bake.
Step 9: Bake According to Your Filling
Your crust is now ready for the oven! Follow your pie filling recipe’s baking instructions, knowing the crust is sturdy enough to hold your creation but built for flaky, buttery perfection. Remember, this recipe yields enough dough for a full double crust pie, so you can fill your kitchen with the aroma of baking goodness.
How to Serve Grandma’s Classic Pie Crust Recipe

Garnishes
A classic pie crust is a canvas for some beautiful finishing touches. Sprinkle coarse sugar on the top crust before baking to add sparkle and a gentle crunch. Or brush the top with an egg wash for a golden, glossy finish that looks as good as it tastes.
Side Dishes
Pair your pie featuring Grandma’s Classic Pie Crust Recipe with fresh whipped cream, vanilla ice cream, or a drizzle of caramel sauce to elevate every bite. For savory pies, a crisp green salad or roasted vegetables make excellent companions.
Creative Ways to Present
Think beyond the traditional pie dish. Use this versatile pie crust for mini hand pies, tartlets, or savory pot pies. You can cut creative shapes from the top crust or weave lattice patterns to add charm and rustic elegance to your presentation.
Make Ahead and Storage
Storing Leftovers
If you have leftover pie crust dough, wrap it tightly in plastic wrap and store it in the refrigerator for up to two days. This keeps the fats firm and the dough pliable for your next baking adventure.
Freezing
Grandma’s Classic Pie Crust Recipe freezes beautifully! After forming the dough discs, wrap them securely in plastic and foil, then freeze for up to three months. Thaw overnight in the fridge before rolling out, making it a fantastic time-saver.
Reheating
Unbaked dough is best baked fresh, but if you’ve baked your pie and want to reheat a slice, warm it at 350°F for 10-15 minutes to bring back that crisp flakiness. Avoid the microwave for reheating to prevent sogginess.
FAQs
Can I use all-purpose flour instead of pastry flour?
Absolutely! While pastry flour yields a more tender crust due to its lower protein content, all-purpose flour is a great substitute and will still produce delicious results with Grandma’s Classic Pie Crust Recipe.
Why is vinegar added to the pie crust dough?
The vinegar helps tenderize the dough by inhibiting gluten formation, resulting in a softer, flakier crust. It’s a secret little trick that Grandma swore by to keep her crust light and delicate.
Can I substitute shortening for all the butter?
While you can use all shortening or all butter, the combination of both brings the best of both worlds—the flakiness from shortening and the rich flavor from butter. Sticking to the original mix in Grandma’s Classic Pie Crust Recipe will give you the most satisfying texture and taste.
How do I prevent my pie crust from shrinking during baking?
To avoid shrinkage, be careful not to stretch the dough when fitting it into the pan and chill it well before baking. Also, avoid overworking the dough as warming the fats too much could make it less stable.
Is it necessary to chill the dough before rolling it out?
Chilling is highly recommended because it firms up the fats within the dough and relaxes the gluten, making it easier to roll and preventing the crust from shrinking or becoming tough during baking.
Final Thoughts
There’s something truly special about Grandma’s Classic Pie Crust Recipe that keeps us reaching for it time and again. Its simplicity, combined with such foolproof results, makes it a cherished staple in any kitchen. Once you try it, you’ll feel like you’ve inherited a little piece of baking magic to share with everyone at your table. So go ahead, roll up your sleeves, and create that perfect pie crust that brings everyone back for seconds — just like Grandma used to make.
Print
Grandma’s Classic Pie Crust Recipe
- Prep Time: 10 minutes
- Cook Time: Depends on the pie filling and recipe
- Total Time: Approx. 10 minutes plus baking time according to your pie recipe
- Yield: Enough dough for a double crust pie (8 servings)
- Category: Baking
- Method: Baking
- Cuisine: American
Description
This classic Grandma’s Pie Crust Recipe yields a tender, flaky crust perfect for both single and double-crusted pies. Made with a blend of pastry flour, shortening, and cold butter, the crust offers a buttery texture and rich flavor, enhanced by the addition of vinegar for extra tenderness. Ideal for fruit pies, custards, and more, this versatile dough is easy to prepare and rolls out smoothly for a professional finish.
Ingredients
Dry Ingredients
- 3 cups pastry flour (or all-purpose flour, 390 grams)
- 1/2 teaspoon salt (2 grams)
Fats
- 1/2 cup shortening (95 grams)
- 1/2 cup cold unsalted butter (4 ounces)
Liquid Ingredients
- 1/2 cup ice cold water (4 ounces)
- 1 tablespoon white vinegar (14 grams)
Instructions
- Sift Dry Ingredients: Sift the flour and salt into a large mixing bowl to ensure even distribution and to remove any lumps.
- Cut in Fats: Using a pastry cutter or two knives, cut in the shortening and cold butter until the mixture resembles coarse crumbs with pea-sized pieces of fat.
- Add Liquid: Combine the ice cold water and white vinegar in a measuring cup, then gradually add this to the flour mixture. Stir gently until the dough just comes together and can be handled without crumbling.
- Prepare Surface: Lightly sprinkle flour onto a clean countertop or rolling surface to prevent sticking.
- Divide Dough: Split the dough into two equal discs, wrapping them in plastic wrap if not using immediately.
- Roll Out Dough: Roll out one disc on a floured surface, making it about 1 inch larger than your pie pan for adequate overhang.
- Fit Bottom Crust: Carefully transfer the rolled dough into the pie pan, gently pressing it to fit the bottom and sides without stretching.
- Shape Edges for Single Crust: If making a bottom crust only, tuck the edge under and use your thumbs to flute the edges decoratively.
- Assemble Double Crust: For a double crust pie, fill the bottom crust with your chosen filling. Roll out the second dough disc and place it over the filling. Fold the edges underneath the bottom crust edge, pressing to seal. Crimp the edges with fingers or a fork, and poke vent holes in the top crust with a fork to allow steam to escape during baking.
- Bake: Follow the baking instructions of your specific pie recipe. This crust recipe makes enough dough for a double crusted pie.
Notes
- Keep all wet ingredients and fats cold to ensure a flaky crust.
- The vinegar helps tenderize the dough and inhibit gluten development for a flaky texture.
- Do not overwork the dough to prevent toughness.
- If not using immediately, wrap the dough discs tightly in plastic wrap and refrigerate for up to 48 hours or freeze for up to 1 month.
- Adjust the amount of ice water slightly if the dough feels too dry or too wet during mixing.
