
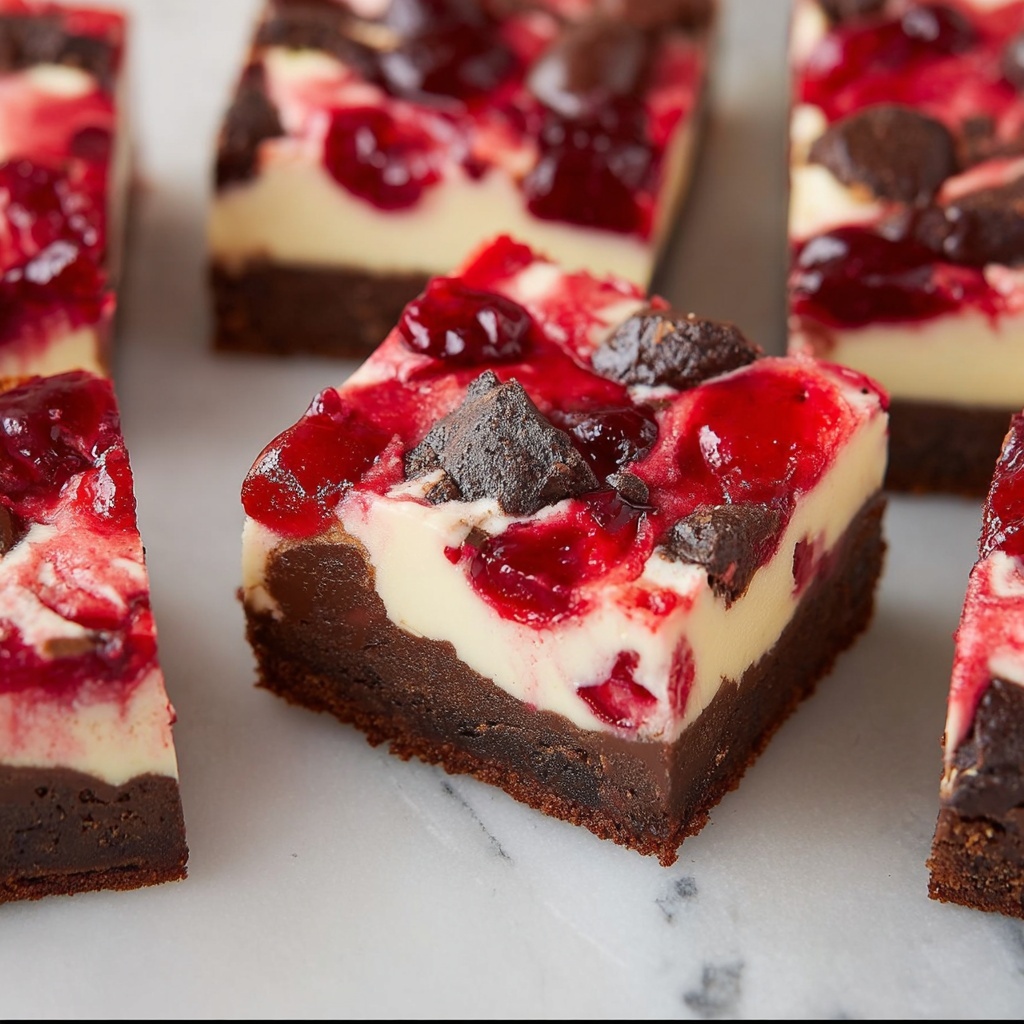
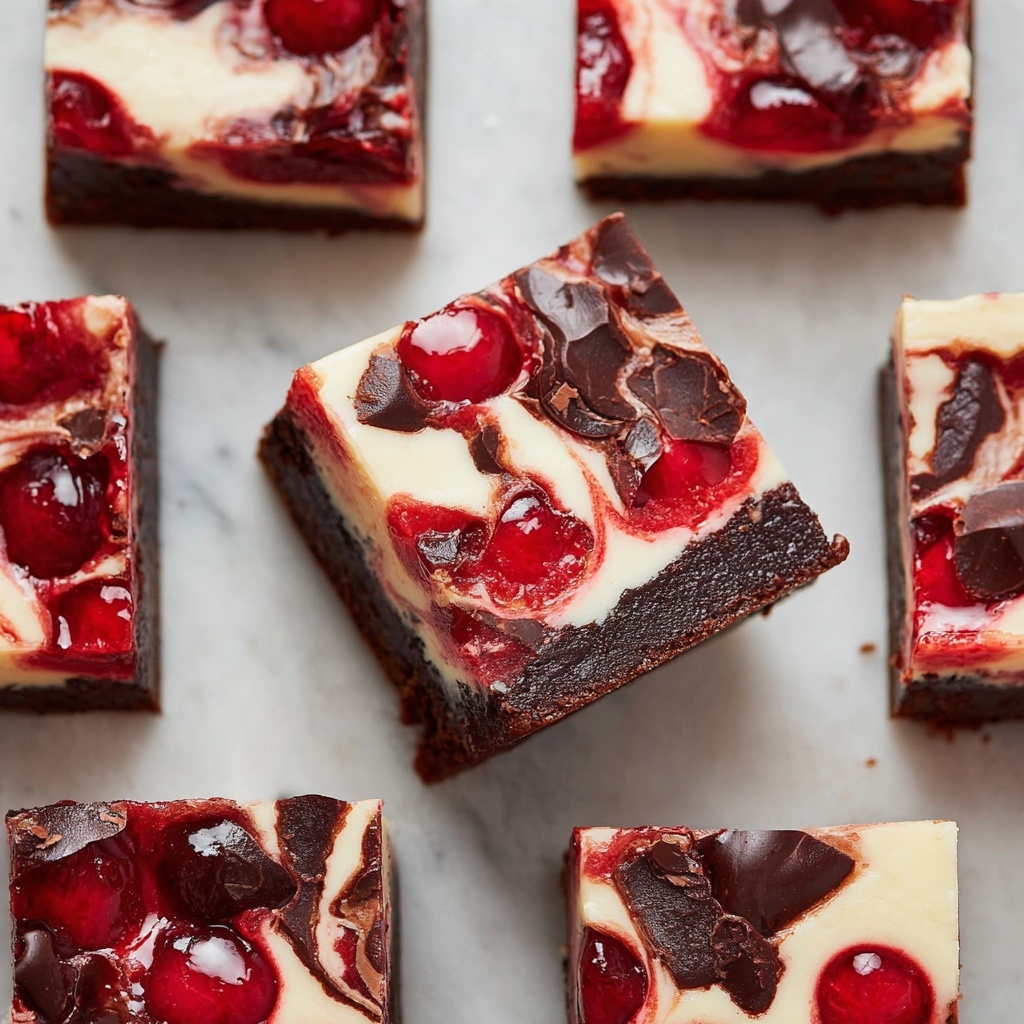
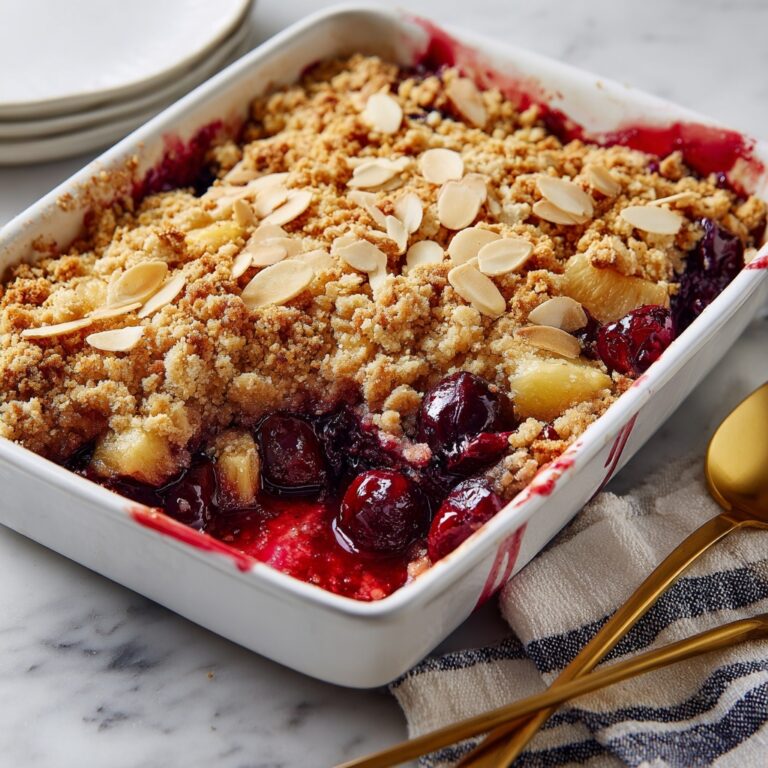
If you have a sweet tooth and love the rich combination of chocolate and cherries, then the Cherry Chocolate Brownie Cheesecake Bars Recipe is going to become your new obsession. These bars bring together a fudgy brownie base, a creamy cheesecake layer, and luscious cherry pie filling, all topped with gooey chocolate chips. The contrasting textures and flavors create a heavenly dessert experience that’s perfect for sharing with family or indulging in on your own. Every bite offers that perfect balance of tart cherries, smooth cheesecake, and rich chocolate brownie, making this recipe an absolute must-try.
Ingredients You’ll Need
The magic of the Cherry Chocolate Brownie Cheesecake Bars Recipe lies in its simple but essential ingredients. Each component plays a crucial role: from the creamy, tangy cheesecake to the decadent brownie batter and the sweet-tart cherries that brighten the whole dish.
- Unsalted butter (1 cup, melted): Provides richness and a buttery base for the brownie layer.
- Granulated sugar (1 1/2 cups): Sweetens both the brownie and cheesecake layers perfectly.
- Large eggs (3 total): Act as a binding agent and give structure to the brownies and cheesecake.
- Vanilla extract (1 1/2 teaspoons): Adds a warm, aromatic depth to the layers.
- Unsweetened cocoa powder (3/4 cup): Gives the brownies their intense chocolatey flavor without extra sweetness.
- All-purpose flour (1 cup): Adds just the right amount of structure to the brownie layer.
- Salt (1/4 teaspoon): Balances and enhances the sweetness.
- Baking powder (1/2 teaspoon): Provides a slight lift to keep the brownies from being too dense.
- Cream cheese (8 ounces, softened): Makes the cheesecake layer luxuriously smooth and creamy.
- Granulated sugar (1/3 cup): Sweetens the cheesecake without overpowering the tang.
- Cherry pie filling (3/4 cup): Brings fruity brightness and a pop of color to the bars.
- Semi-sweet chocolate chips (1/2 cup): Add melty, chocolaty goodness on top.
How to Make Cherry Chocolate Brownie Cheesecake Bars Recipe
Step 1: Prepare Your Pan and Batter
Start by preheating your oven to 350°F (175°C) and lining a 9×13 inch baking pan with parchment paper. This ensures easy removal later and perfect square slices. Then, in a large bowl, whisk together the melted butter and 1 1/2 cups sugar until nice and smooth. This step creates the rich sweetness that complements the cocoa powder perfectly.
Step 2: Make the Brownie Batter
Add the eggs and vanilla extract to the butter and sugar mixture and stir until fully combined. Next, sift in the cocoa powder, flour, salt, and baking powder, stirring just until a thick brownie batter forms. It should be luscious and fudgy, ready to spread into your prepared pan.
Step 3: Layer the Brownie Base
Spread about two thirds of the brownie batter evenly across the bottom of your pan. This will form the decadent base supporting the cheesecake and cherry layers, so make sure it’s even to give a uniform bake.
Step 4: Prepare the Cheesecake Layer
In a separate bowl, beat together the softened cream cheese and 1/3 cup sugar until silky smooth. Add the remaining egg and vanilla extract and mix until creamy and well blended. This cheesecake layer acts as a luscious middle layer that balances the dense brownie and sweet cherries.
Step 5: Assemble the Layers
Gently spread the cheesecake mixture over the brownie base, making sure not to break the batter underneath. Dollop spoonfuls of cherry pie filling over the cheesecake layer, then lightly swirl it in with a knife to create beautiful marbling. Lastly, drop spoonfuls of the remaining brownie batter on top and sprinkle with semi-sweet chocolate chips for extra chocolate bursts as the bars bake.
Step 6: Bake to Perfection
Bake for 35 to 40 minutes, or until the center is just set but still slightly jiggly. Overbaking can dry out the cheesecake, so keep an eye on it. After baking, allow the bars to cool completely in the pan. For the best slicing texture, chill them in the fridge for about an hour before cutting into squares.
How to Serve Cherry Chocolate Brownie Cheesecake Bars Recipe
Garnishes
These bars are already a showstopper, but you can make them even more special with simple garnishes. A light dusting of powdered sugar or a drizzle of melted chocolate adds eye-catching appeal. Fresh cherries or a dollop of whipped cream take the presentation to the next level, especially for a festive touch.
Side Dishes
Pair your Cherry Chocolate Brownie Cheesecake Bars with a scoop of vanilla ice cream or a rich espresso for a delightful contrast. Fresh fruit, like raspberries or strawberries, can lighten the dessert’s richness and complement the cherry flavor beautifully.
Creative Ways to Present
If you’re serving these bars at a party, consider cutting them into mini bites and arranging them on a decorative platter with fresh cherries and chocolate curls. Alternatively, layer crumbled bars with whipped cream and more cherry pie filling in glasses for an elegant parfait-style treat.
Make Ahead and Storage
Storing Leftovers
Once cooled and sliced, store your Cherry Chocolate Brownie Cheesecake Bars in an airtight container in the refrigerator. They will keep beautifully for up to four days, making them a fantastic make-ahead treat for busy weeks or unexpected guests.
Freezing
These bars freeze brilliantly. Wrap each bar individually in plastic wrap and place them in a freezer-safe container or bag. When ready to enjoy, thaw them overnight in the refrigerator. Freezing allows you to enjoy this delicious dessert any time without compromising its texture.
Reheating
If you prefer your bars warm, simply microwave a bar for about 15-20 seconds. This will revive that melty chocolate goodness without making the cheesecake layer too soft. Enjoy them slightly warm with ice cream for an indulgent experience.
FAQs
Can I use fresh cherries instead of cherry pie filling?
Absolutely! Using fresh cherry compote or pitted fresh cherries mixed with a bit of sugar and lemon juice provides a lovely homemade touch and enhances the freshness of the bars.
What type of cream cheese works best?
Regular full-fat cream cheese is recommended for the creamiest texture and richest flavor. Make sure it’s softened to room temperature for easier mixing and a smoother cheesecake layer.
Can I make these bars gluten-free?
Yes, substitute the all-purpose flour with a gluten-free flour blend that measures 1:1 for regular flour. It may slightly alter the texture but will still be delicious.
How thick should I spread the brownie layers?
The first brownie layer should be spread evenly to cover about two thirds of your pan before adding the cheesecake. The remaining brownie batter gets dolloped on top, adding a rustic look and extra fudgy pockets.
Can I prepare these bars in advance for a party?
Definitely! This Cherry Chocolate Brownie Cheesecake Bars Recipe is perfect for making a day ahead. Chill them well before serving, and keep them refrigerated until ready to enjoy.
Final Thoughts
This Cherry Chocolate Brownie Cheesecake Bars Recipe is such a wonderful dessert to have on hand when you want something richly indulgent yet approachable. It balances classic flavors beautifully and always receives rave reviews. I encourage you to give it a try—you might just find a new favorite to share with your loved ones over and over again!
Print
Cherry Chocolate Brownie Cheesecake Bars Recipe
- Prep Time: 20 minutes
- Cook Time: 40 minutes
- Total Time: 1 hour
- Yield: 16 bars
- Category: Dessert
- Method: Baking
- Cuisine: American
- Diet: Vegetarian
Description
Indulge in the rich and decadent Cherry Chocolate Brownie Cheesecake Bars, featuring a luscious layered combination of fudgy brownie, smooth cream cheese cheesecake, and sweet cherry pie filling, all topped with semi-sweet chocolate chips. Perfect for dessert lovers seeking a delightful fusion of chocolate and fruit flavors in every bite.
Ingredients
Brownie Layer
- 1 cup unsalted butter, melted
- 1 1/2 cups granulated sugar
- 2 large eggs
- 1 teaspoon vanilla extract
- 3/4 cup unsweetened cocoa powder
- 1 cup all-purpose flour
- 1/4 teaspoon salt
- 1/2 teaspoon baking powder
Cheesecake Layer
- 8 ounces cream cheese, softened
- 1/3 cup granulated sugar
- 1 large egg
- 1/2 teaspoon vanilla extract
Additional Toppings
- 3/4 cup cherry pie filling
- 1/2 cup semi-sweet chocolate chips
Instructions
- Preheat and Prepare Pan: Preheat the oven to 350°F (175°C) and line a 9×13 inch baking pan with parchment paper to prevent sticking and allow for easy removal.
- Make Brownie Batter: In a large bowl, whisk together the melted butter and 1 1/2 cups granulated sugar until smooth and well combined. Add the eggs and 1 teaspoon vanilla extract, mixing thoroughly. Stir in the cocoa powder, flour, salt, and baking powder until a thick brownie batter forms.
- Layer Brownie Batter: Spread about two-thirds of the brownie batter evenly into the prepared pan, creating a smooth base layer for the cheesecake.
- Prepare Cheesecake Mixture: In a separate bowl, beat the softened cream cheese with 1/3 cup granulated sugar until smooth and creamy. Add 1 egg and 1/2 teaspoon vanilla extract, mixing until fully incorporated.
- Add Cheesecake Layer: Gently spread the cheesecake mixture evenly over the brownie layer, taking care not to disrupt the brownie base.
- Add Cherry Pie Filling: Spoon the cherry pie filling in dollops over the cheesecake layer and lightly swirl with a knife to incorporate some of the cherries into the cheesecake for a marbled effect.
- Top with Remaining Batter and Chocolate Chips: Drop spoonfuls of the remaining brownie batter over the cherry layer and sprinkle evenly with semi-sweet chocolate chips to add extra texture and flavor.
- Bake: Bake in the preheated oven for 35 to 40 minutes, or until the center is set and a toothpick inserted near the middle comes out with only a few moist crumbs.
- Cool and Serve: Allow the bars to cool completely in the pan on a wire rack. For the best texture, chill in the refrigerator for about 1 hour before slicing into 16 squares.
Notes
- For the best texture, chill the bars in the refrigerator for about 1 hour before cutting.
- You can use fresh cherry compote instead of canned pie filling for a more homemade flavor.
- Store leftovers in an airtight container in the refrigerator for up to 4 days.
