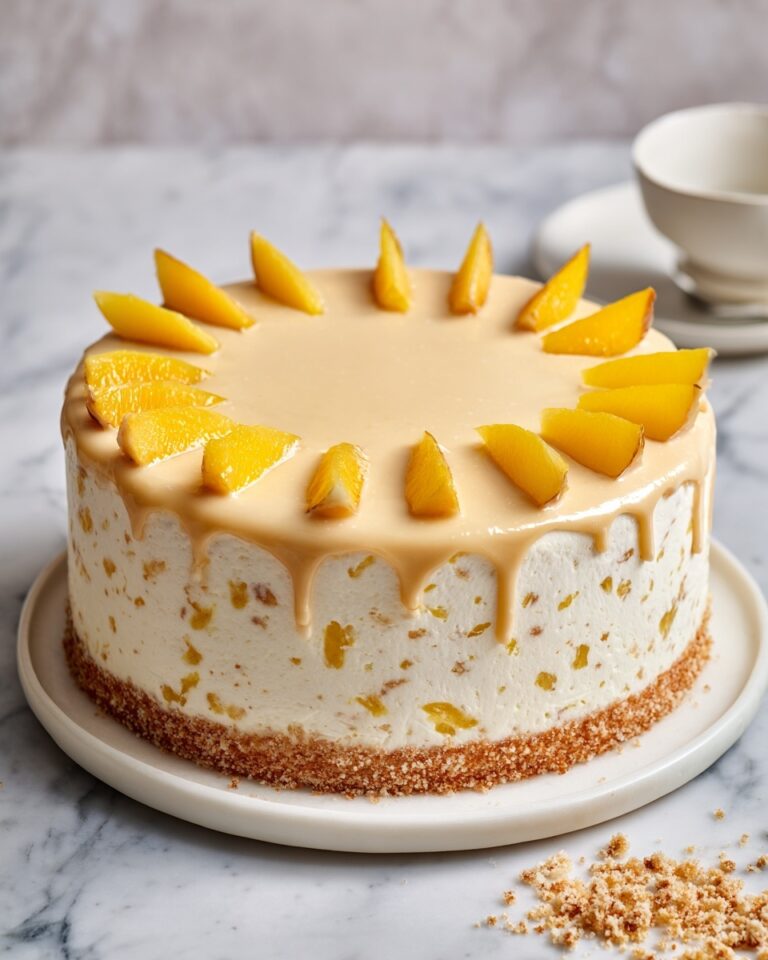
If you adore the classic Italian dessert but crave a refreshing twist, this Matcha Tiramisu Recipe is going to become your new favorite indulgence. Combining the earthy, vibrant flavor of matcha green tea with the rich, velvety layers of mascarpone and whipped cream, this dessert delivers a stunning balance of boldness and creaminess. Each bite melts in your mouth, with delicate matcha-soaked ladyfingers creating a beautiful contrast to the luscious mascarpone layers. Whether you’re treating yourself or impressing friends, this Matcha Tiramisu Recipe brings a sophisticated, delightful experience to your table.
Ingredients You’ll Need
This Matcha Tiramisu Recipe is beautifully straightforward, relying on just a handful of essential ingredients that each add their own magic. From the vivid green matcha powder that provides that unmistakable color and earthy flavor, to the rich mascarpone cheese which lends the creamy texture, every element plays a crucial role.
- Matcha powder: Use good quality, finely sifted matcha for the best flavor and vibrant green color.
- Water: Helps dissolve the matcha powder into a smooth soaking liquid for the ladyfingers.
- Egg yolks: Create a silky custard base, lending richness and structure to the dessert.
- Granulated sugar: Sweetens the egg yolk custard perfectly without overwhelming the matcha’s subtle bitterness.
- Brandy: Adds a subtle depth and warmth, enhancing the overall flavor profile.
- Mascarpone cheese: The heart of any tiramisu, it adds creamy indulgence and a smooth mouthfeel.
- Heavy cream: Divided for folding into mascarpone and for making a sweetened whipped cream topping.
- Icing sugar: Sweetens and stabilizes the whipped cream topping for that perfect, fluffy finish.
- Savoiardi (ladyfinger) biscuits: Light and airy, ideal for soaking up the matcha liquid without becoming soggy.
- Extra matcha powder: For dusting on top, enhancing both presentation and flavor intensity.
How to Make Matcha Tiramisu Recipe
Step 1: Prepare the Egg Yolk Custard
Start by whisking together the egg yolks and granulated sugar over a double boiler. Maintain the temperature carefully until the mixture reaches about 74°C (165°F). This step thickens the custard while lightening its color, giving it a luscious, slightly fluffy texture. Once done, remove it from the heat and allow it to cool naturally at room temperature. This step ensures a rich foundation for the creamy layers to come.
Step 2: Divide and Whip the Heavy Cream
Separate your heavy cream into two equal portions. The first portion will be gently whipped into soft peaks to be folded with the mascarpone mixture, lending it a light, airy texture. The second will be whipped separately with icing sugar into a sweetened topping that balances the earthiness of the matcha with delicate sweetness.
Step 3: Make the Mascarpone Cream
Carefully stir the mascarpone cheese into your cooled egg yolk custard until smooth and uniform. Next, gently fold in the softly whipped heavy cream to create a rich yet fluffy mascarpone cream. This step is all about maintaining lightness while ensuring a luxuriously creamy filling that melts on the tongue.
Step 4: Prepare the Matcha Soaking Liquid
Combine the matcha powder thoroughly with water in a rimmed plate until completely smooth, making sure there are no lumps. This vibrant liquid will be the key to soaking the ladyfingers, infusing the dessert with that signature matcha flavor and beautiful green hue. Be swift but gentle when dipping the biscuits so they soak evenly without disintegrating.
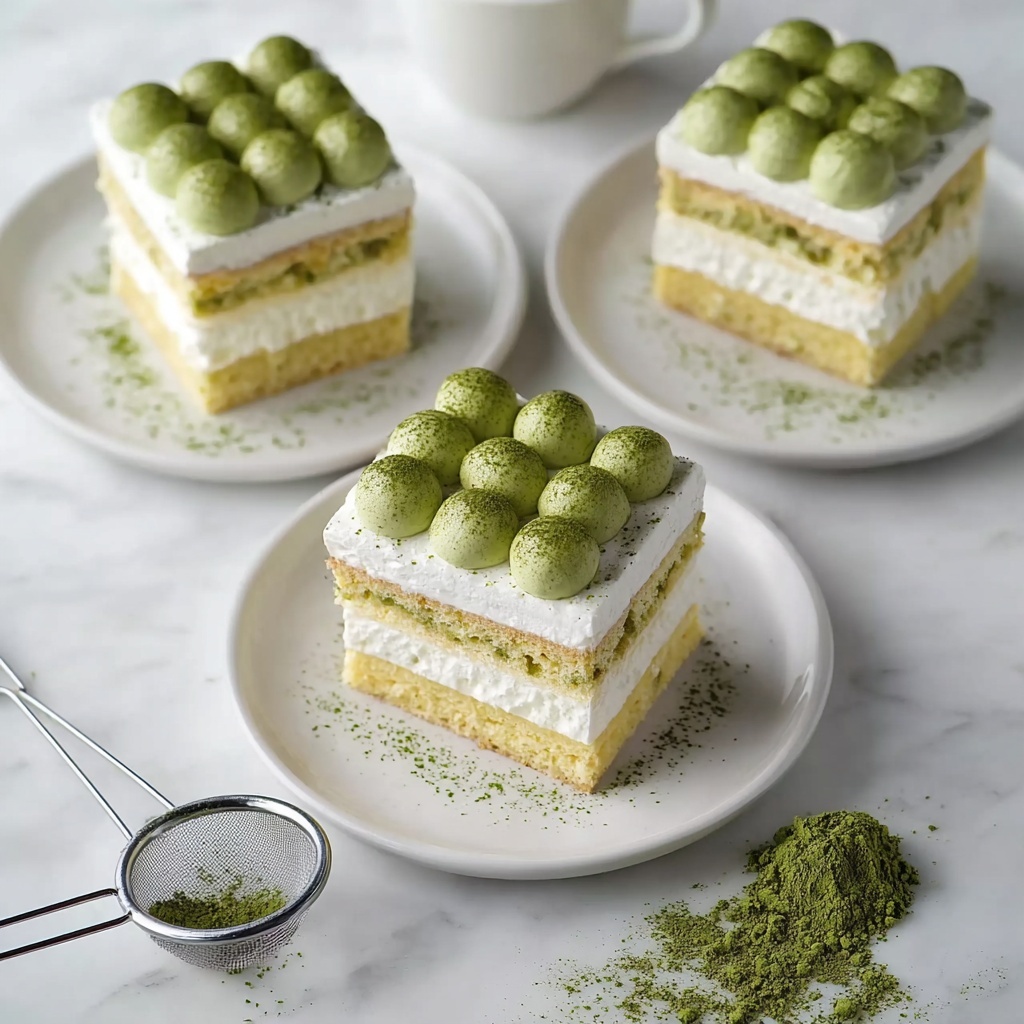
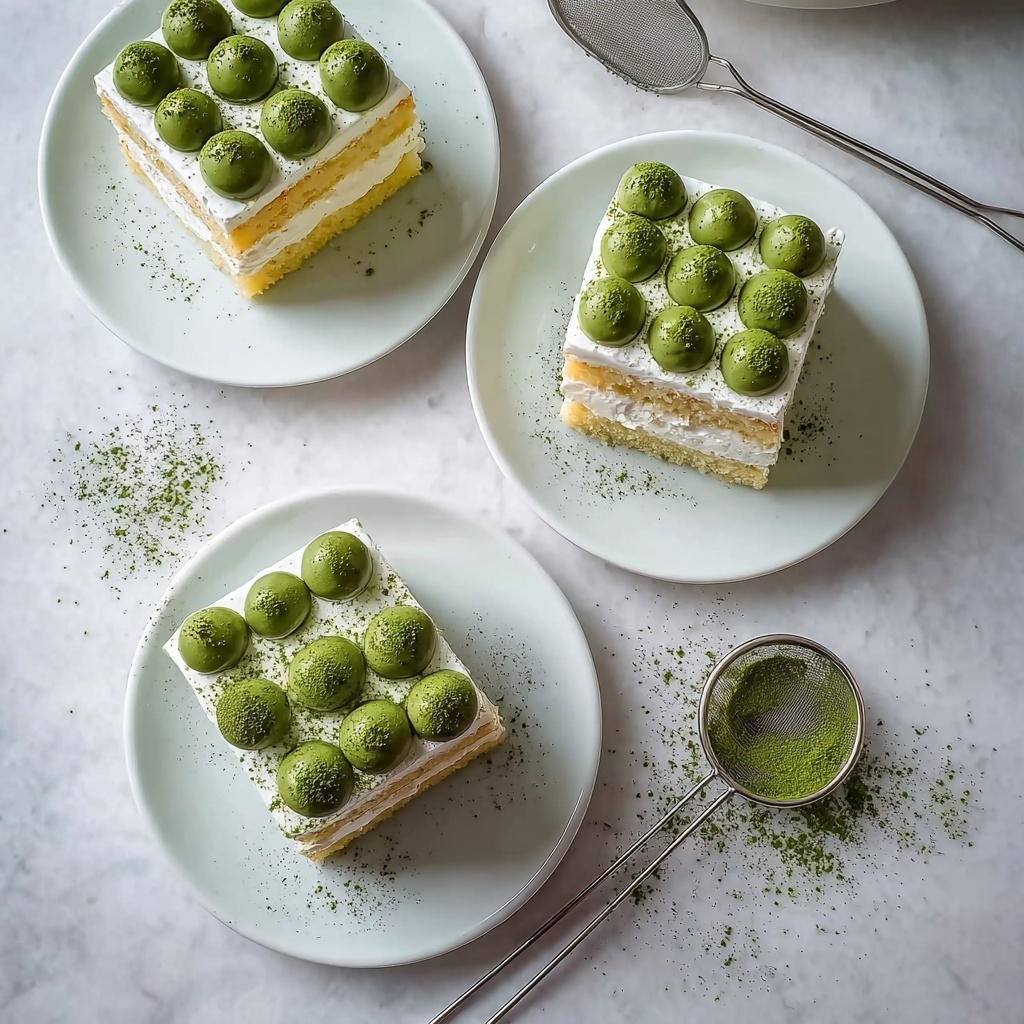
Step 5: Assemble the Layers
Begin assembling your tiramisu by briefly dipping the ladyfingers into the matcha soaking liquid, then arranging them in a single layer at the bottom of an 8×8 inch dish or individual cups. Spread a third of the mascarpone cream evenly over the biscuits, then repeat the layering process two more times, achieving three delicious layers of matcha-soaked biscuits and creamy filling. This layering builds the perfect balance between moist and creamy textures.
Step 6: Top and Chill
Pipe or spoon the sweetened whipped cream over the topmost mascarpone layer, creating an inviting, fluffy crown for your tiramisu. Finish by dusting liberally with extra matcha powder for a stunning visual contrast and an extra hit of green tea flavor. Refrigerate the dessert for at least two hours so the flavors meld beautifully and the tiramisu sets to a perfect sliceable consistency.
How to Serve Matcha Tiramisu Recipe
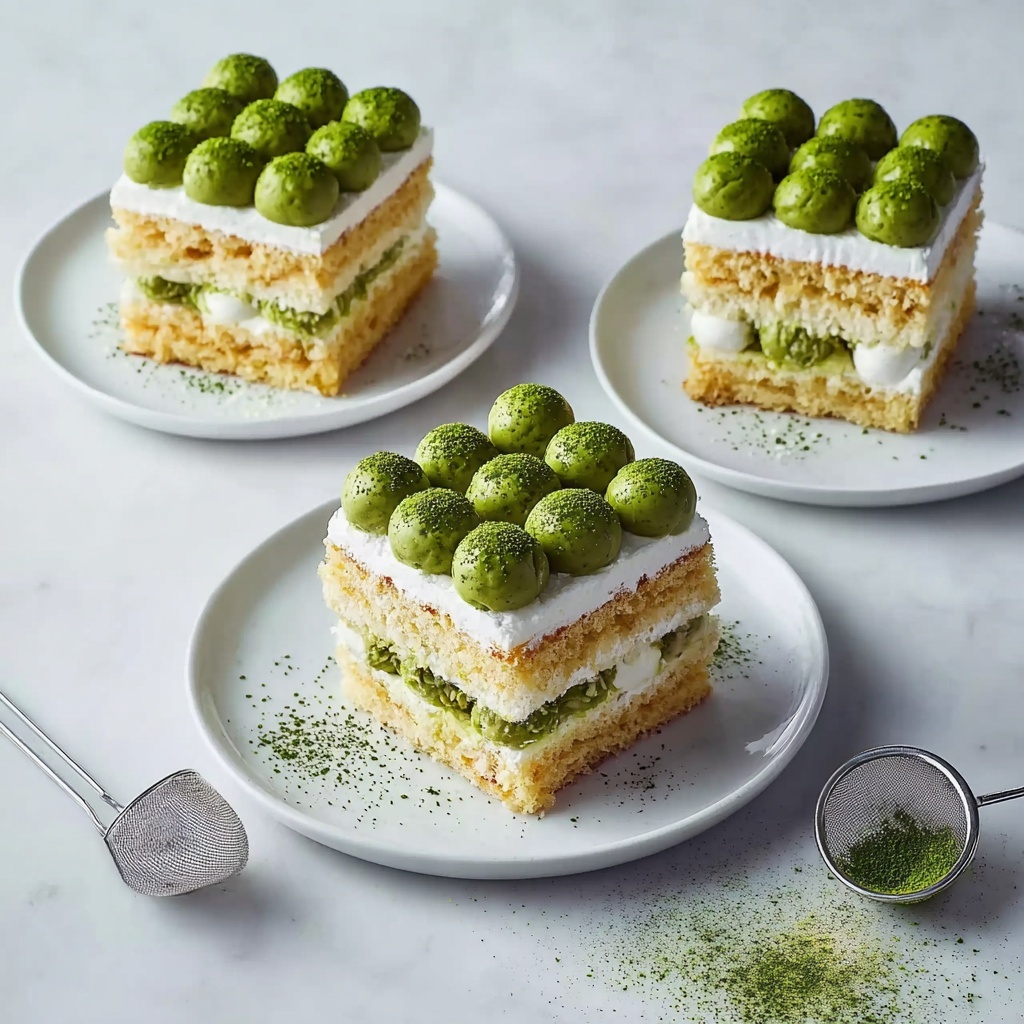
Garnishes
When it comes to garnishing your Matcha Tiramisu Recipe, the simplest touches work best. A generous sift of matcha powder on top enhances its earthy aroma and adds visual appeal. For a touch of elegance, sprinkle a few white chocolate shavings or finely chopped pistachios to complement the green hues. Fresh mint leaves also add a nice pop of color and a refreshing hint that pairs well with matcha.
Side Dishes
This matcha-infused dessert is beautifully rich on its own, but if you want to build a full experience, think about light accompaniments. A pot of hot green tea or a delicate jasmine tea complements the matcha flavors splendidly without overwhelming the palate. For a contrasting texture, serve alongside some crisp biscotti or almond cookies for guests to nibble on between bites.
Creative Ways to Present
Presenting this Matcha Tiramisu Recipe in individual glass cups or mason jars not only looks charming but makes serving effortless. Layered glass presentations show off the vibrant green and creamy layers like edible art. Alternatively, try using decorative silicone molds for mini tiramisu bites that make for perfect party treats. A drizzle of white chocolate or a dusting of edible gold powder can elevate the presentation for special occasions.
Make Ahead and Storage
Storing Leftovers
You can store any leftovers of this Matcha Tiramisu Recipe covered tightly in the refrigerator for up to three days. Keep it chilled to maintain the creamy texture and fresh flavor, and always cover it well to prevent it from absorbing any other odors in the fridge.
Freezing
While tiramisu is best enjoyed fresh, you can freeze the Matcha Tiramisu for up to one month. Cover it securely with plastic wrap and foil to protect the delicate layers. Thaw it overnight in the refrigerator before serving, though note that freezing may slightly change the texture of the creamy layers.
Reheating
Since tiramisu is a chilled dessert, reheating is not recommended. Instead, allow your dessert to come to refrigerator temperature before serving if it feels too cold. This way, every bite will be irresistibly smooth and full of flavor.
FAQs
Can I use a substitute for mascarpone cheese in this Matcha Tiramisu Recipe?
Yes, if mascarpone is hard to find, a mixture of cream cheese and heavy cream can work as a substitute, though it may slightly alter the authentic flavor and texture. Whipping cream cheese with a bit of heavy cream can mimic mascarpone’s richness quite well.
Is it safe to eat raw egg yolks in this tiramisu?
This recipe involves cooking the egg yolks gently in a double boiler to a safe temperature (about 74°C or 165°F), which reduces any risks associated with raw eggs. If you’re concerned, this step ensures the custard is cooked through safely.
What type of matcha powder is best for this recipe?
For a vibrant flavor and color, use culinary-grade matcha powder that is smooth and finely sifted. Avoid lower quality matcha as it can taste bitter or grainy, impacting the overall dessert experience.
Can I prepare this Matcha Tiramisu Recipe in smaller, individual portions?
Absolutely! Using ramekins or small glasses to assemble individual servings is a fantastic idea, especially for parties and gatherings. It also makes serving and transporting the dessert easier and more elegant.
How long should I let the tiramisu chill before serving?
For the best flavor and texture, allow the dessert to chill in the refrigerator for at least 2 hours, though overnight chilling is ideal. This resting time lets the matcha flavor fully infuse the ladyfingers and the mascarpone layers set perfectly.
Final Thoughts
This Matcha Tiramisu Recipe is a charming fusion of Italian tradition and Japanese elegance that’s truly irresistible. It’s a dessert that delights both in flavor and appearance, perfect for sharing with loved ones or savoring during a special moment. Dive into the luscious layers and the earthy matcha aroma — trust me, once you try it, you’ll be reaching for seconds every time.
Print
Matcha Tiramisu Recipe
- Prep Time: 30 minutes
- Cook Time: 10 minutes
- Total Time: 2 hours 40 minutes
- Yield: 6 servings
- Category: Dessert
- Method: No-Cook
- Cuisine: Italian-Japanese Fusion
Description
A delightful twist on the classic Italian tiramisu, this Matcha Tiramisu combines the rich creaminess of mascarpone with the earthy, vibrant flavor of matcha green tea powder. Layered with delicate Savoiardi biscuits soaked in matcha, this no-bake dessert is perfectly chilled and dusted with matcha powder for a stunning finish. Ideal for tea lovers and those seeking a unique dessert experience.
Ingredients
Matcha Soaking Mixture
- 2 tbsp matcha powder
- 1 cup water
Custard Mixture
- 3 egg yolks
- 3 tbsp granulated sugar
- 1 tbsp brandy
Mascarpone Cream
- 1 cup mascarpone cheese
- 1 cup heavy cream (divided in two 1 cup portions)
Sweetened Whipped Cream Topping
- 1 cup heavy cream
- 1 cup icing sugar
Assembly
- 30 Savoiardi (ladyfinger) biscuits
- Extra matcha powder for dusting
Instructions
- Prepare the egg yolk custard
In a double boiler, whisk together the egg yolks and granulated sugar while heating until the mixture reaches 74°C (165°F). The custard should thicken slightly, lighten in color, and increase in volume. Remove from heat and let cool to room temperature. - Divide the heavy cream
Separate the heavy cream into two equal portions of 1 cup each for different uses in the recipe. - Make the mascarpone cream
Whip one cup of heavy cream until soft peaks form. Stir the mascarpone cheese into the cooled egg yolk custard until smooth, then gently fold in the whipped cream to create a light and creamy mixture. Set aside. - Prepare the sweetened whipped cream topping
Whip the remaining cup of heavy cream slowly, gradually adding icing sugar, until soft, sweetened whipped cream forms. Refrigerate until needed. - Mix the matcha soaking liquid
In a shallow dish, thoroughly combine the matcha powder with water until smooth and fully dissolved. - Assemble the tiramisu layers
Briefly dip Savoiardi biscuits into the matcha mixture and arrange a single layer in an 8×8 inch serving dish or individual cups, covering the base completely. - Add mascarpone layer
Spread one-third of the mascarpone cream evenly over the soaked biscuits. - Repeat layering
Repeat dipping biscuits and layering mascarpone cream two more times to create a total of three layers. - Top with whipped cream
Remove the sweetened whipped cream from the fridge and pipe or spoon dollops over the final mascarpone layer, decorating as desired. - Finish and chill
Dust the top liberally with extra matcha powder. Refrigerate the assembled tiramisu for at least 2 hours to set and allow flavors to meld before serving.
Notes
- Use fresh, high-quality matcha powder for the best flavor and vibrant green color.
- Be careful not to soak the Savoiardi biscuits too long in the matcha mixture to prevent them from becoming soggy.
- For food safety, ensure the egg yolks reach the recommended temperature to eliminate risk of salmonella.
- This dessert is best served chilled and consumed within 2 days for optimal freshness.


