
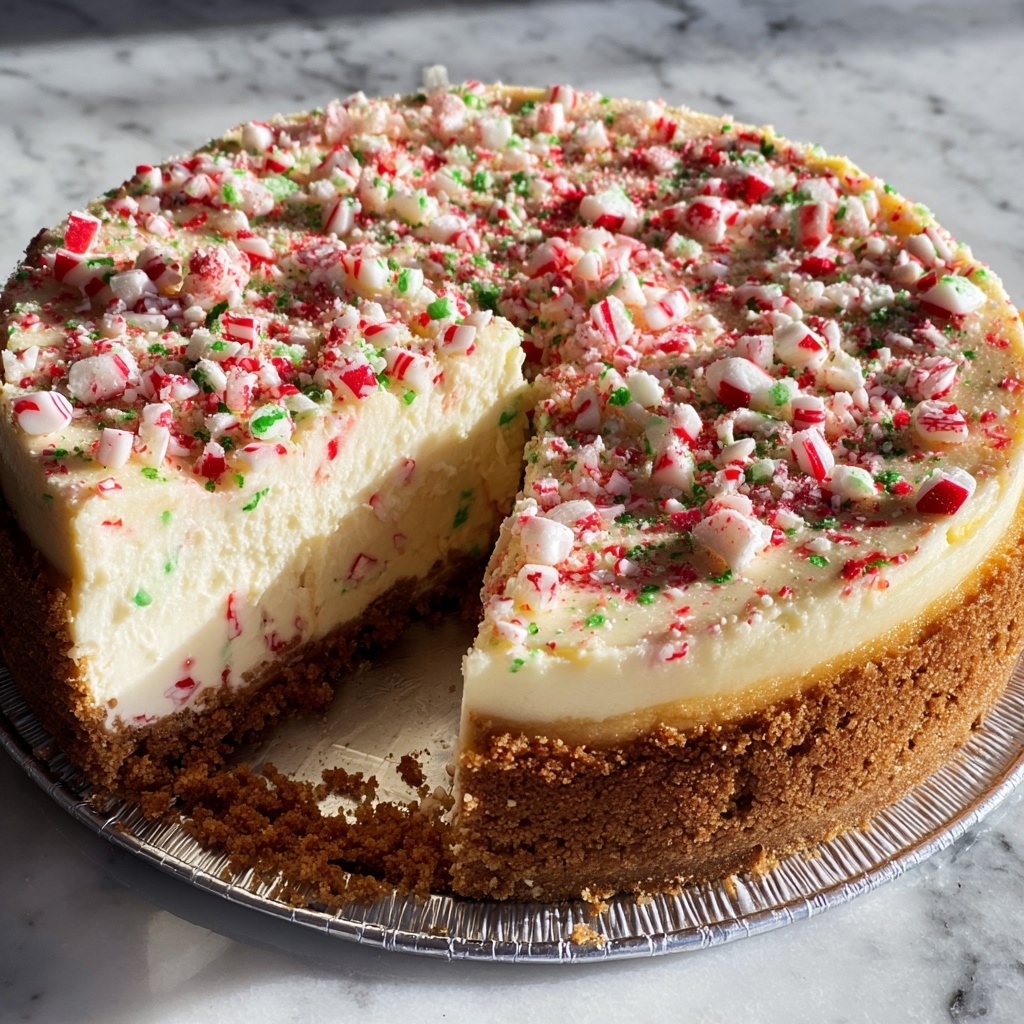
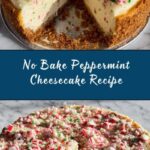
If you’re searching for a festive treat that’s as delightful to make as it is to eat, this No Bake Peppermint Cheesecake Recipe is here to steal the show! It’s a creamy, minty dream with a buttery graham cracker crust that sets perfectly without needing any oven time. Whether you’re gearing up for a holiday party or just craving a refreshing dessert, this cheesecake brings together simple ingredients in a way that feels both indulgent and refreshingly light. Trust me, once you try this No Bake Peppermint Cheesecake Recipe, you’ll find it hard to keep it off your dessert rotation.

Ingredients You’ll Need
Every ingredient in this No Bake Peppermint Cheesecake Recipe plays a special role in creating the perfect balance of texture and flavor. From the crunchy crust to the fluffy peppermint-infused filling, these essentials are both simple and magical.
- 1 ½ cups graham cracker crumbs: Provides a crunchy, buttery base that forms the perfect crust to hold the cheesecake.
- ½ cup unsalted butter, melted: Binds the graham cracker crumbs together and adds rich flavor without overpowering the peppermint.
- 2 cups cream cheese, softened: The heart of the filling, offering a smooth and tangy texture essential for cheesecake.
- 1 cup powdered sugar: Sweetens gently without graininess, creating that classic cheesecake sweetness.
- 1 teaspoon vanilla extract: Adds warmth and depth that complements the peppermint perfectly.
- 1 teaspoon peppermint extract: Infuses the cheesecake with refreshing, festive mint flavor that’s not too overpowering.
- 1 cup heavy whipping cream: Whipped to soft peaks, it lightens the filling for a luscious, airy texture.
- ½ cup crushed peppermint candies: Adds crunch and bursts of cool mint throughout the creamy filling.
How to Make No Bake Peppermint Cheesecake Recipe
Step 1: Create the Crust
Start by combining the graham cracker crumbs with the melted unsalted butter. This simple mixture forms the foundation of your cheesecake. Press it evenly into the bottom of a springform pan so it holds together firmly. The crust is buttery and slightly crunchy, giving a wonderful contrast to the creamy filling.
Step 2: Beat the Cream Cheese
In a large bowl, beat the softened cream cheese until it reaches a smooth and creamy consistency. This step is vital because any lumps will affect your cheesecake’s silky texture. Cream cheese brings the signature tang and richness that makes cheesecake so special.
Step 3: Flavor the Filling
Add powdered sugar, vanilla extract, and peppermint extract to the cream cheese. Mixing these in well ensures every bite has the perfect harmony of sweet, vanilla warmth, and crisp peppermint, creating that classic holiday flavor profile.
Step 4: Whip the Cream
In a separate bowl, whip the heavy cream until soft peaks form. This whipped cream is what lightens the rich cream cheese base, making the cheesecake fluffy and airy instead of dense. Gently folding it in maintains this lightness while incorporating the creamy mixture with ease.
Step 5: Combine and Chill
Gently fold the crushed peppermint candies into the cream cheese mixture, giving the cheesecake delightful pops of mint and texture. Spread this luscious filling evenly over the prepared crust. Pop the whole pan into the refrigerator and chill for at least 4 hours to allow the cheesecake to set perfectly. After chilling, your dessert is ready for the grand finale: serving!
How to Serve No Bake Peppermint Cheesecake Recipe
Garnishes
Topping off your cheesecake with a sprinkle of extra crushed peppermint candies not only adds a festive, colorful touch but also enhances the peppermint crunch in every bite. For an elegant twist, consider adding a few fresh mint leaves or a drizzle of white chocolate for that classic holiday vibe.
Side Dishes
This peppermint cheesecake pairs beautifully with a cup of hot cocoa or spiced coffee to balance the cool mint flavors. Fresh berries or a berry compote alongside serve as a bright, fruity contrast that complements the creamy texture perfectly without competing with the peppermint notes.
Creative Ways to Present
For a party, you can prepare this No Bake Peppermint Cheesecake Recipe in individual clear glasses or mini jars with layers of crust and filling for a delightful presentation. Adding edible glitter or crushed candy canes on top brings extra sparkle that everyone will appreciate. Don’t be afraid to get creative and tailor the presentation to your festive theme!
Make Ahead and Storage
Storing Leftovers
To keep your cheesecake fresh and delicious, cover it tightly with plastic wrap or place it in an airtight container in the refrigerator. Properly stored, it will stay flavorful and creamy for up to 4 days—making it perfect to prepare ahead of time for any gathering.
Freezing
If you want to save this No Bake Peppermint Cheesecake Recipe for later, freezing is an excellent option. Wrap the cheesecake tightly in plastic wrap and then in foil before placing in the freezer. It can be frozen for up to a month. When ready, thaw it overnight in the refrigerator to enjoy that perfect creamy texture.
Reheating
This dessert is best served chilled, so reheating is not recommended. Simply let it come to cool room temperature for about 15 minutes before serving if you prefer it slightly softer. This way, the flavors shine and the texture remains wonderfully creamy.
FAQs
Can I use a different crust for this No Bake Peppermint Cheesecake Recipe?
Absolutely! While graham cracker crust is classic and delicious, you can swap it for crushed chocolate cookies or ginger snaps for added flavor variations that complement the peppermint beautifully.
Is there a substitute for heavy whipping cream?
For the best texture, heavy whipping cream is ideal, but you can use canned coconut cream if you want a dairy-free option. Just whip it well to achieve the fluffy texture needed for the filling.
How long does it take for the cheesecake to set properly?
Chilling your cheesecake for at least 4 hours is essential to let it fully set. If you’re short on time, refrigerate for 3 hours but for the best sliceable consistency, the longer chilling is recommended.
Can I make this recipe nut-free?
Yes! This recipe naturally does not contain nuts, but just be sure to check that your peppermint candies and any other added ingredients are nut-free if allergies are a concern.
How can I make this cheesecake look extra festive?
Try decorating with crushed candy canes, edible glitter, or white chocolate shavings. Using a festive springform pan or serving on a colorful platter adds an extra holiday touch everyone will love.
Final Thoughts
This No Bake Peppermint Cheesecake Recipe is a must-try for anyone who loves easy, festive desserts packed with flavor and texture. It’s a fun project that doesn’t require the oven, making it especially perfect during busy holiday seasons or any time you want to impress friends without stress. Give it a go—the creamy, minty magic will brighten your dessert table and keep everyone asking for seconds!
Print
No Bake Peppermint Cheesecake Recipe
- Prep Time: 20 minutes
- Cook Time: 0 minutes
- Total Time: 4 hours 20 minutes
- Yield: 8 servings
- Category: Dessert
- Method: No-Cook
- Cuisine: American
- Diet: Vegetarian
Description
This No Bake Peppermint Cheesecake is a festive and creamy dessert perfect for the holiday season. With a buttery graham cracker crust and a light, fluffy peppermint cream cheese filling, it offers a delightful balance of sweetness and refreshing mint flavor without any baking required. Easy to prepare and perfect for entertaining, this cheesecake sets beautifully in the refrigerator for a chilled, indulgent treat.
Ingredients
Crust
- 1 ½ cups graham cracker crumbs
- ½ cup unsalted butter, melted
Filling
- 2 cups cream cheese, softened
- 1 cup powdered sugar
- 1 teaspoon vanilla extract
- 1 teaspoon peppermint extract
- 1 cup heavy whipping cream
- ½ cup crushed peppermint candies
Garnish
- Additional crushed peppermint candies (optional)
Instructions
- Prepare the crust: In a medium bowl, combine the graham cracker crumbs and melted unsalted butter. Mix thoroughly until the crumbs are evenly coated with butter, forming a crumbly mixture.
- Form the crust base: Press the buttered graham cracker mixture firmly into the bottom of a springform pan, creating an even layer. Set aside while preparing the filling.
- Make the cream cheese base: In a separate mixing bowl, beat the softened cream cheese until smooth and creamy, removing any lumps for a silky texture.
- Add sweeteners and extracts: To the cream cheese, add powdered sugar, vanilla extract, and peppermint extract. Mix well until all ingredients are fully incorporated and the mixture is smooth.
- Whip the cream: In another chilled bowl, whip the heavy whipping cream until soft peaks form, ensuring the cream is light and airy but not stiff.
- Combine whipped cream and cream cheese mixture: Gently fold the whipped cream into the cream cheese mixture, taking care not to deflate the cream so the filling remains light and fluffy.
- Add peppermint candies: Fold in the crushed peppermint candies gently, distributing them throughout the filling without breaking them up too much.
- Assemble the cheesecake: Spread the peppermint cream cheese mixture evenly over the prepared graham cracker crust in the springform pan.
- Chill until set: Refrigerate the cheesecake for at least 4 hours or preferably overnight to allow it to firm up and for the flavors to meld.
- Garnish and serve: Before serving, optionally sprinkle additional crushed peppermint candies on top for extra festive decoration and crunch. Carefully remove the sides of the springform pan and slice to serve chilled.
Notes
- If you prefer a stronger peppermint flavor, you can adjust the peppermint extract to 1 ½ teaspoons.
- To crush peppermint candies easily, place them in a zip-top bag and gently tap with a rolling pin or use a food processor for finer texture.
- This cheesecake can be made up to 2 days in advance and stored covered in the refrigerator.
- For a gluten-free option, substitute graham cracker crumbs with gluten-free cookies or almond flour crust.
- Make sure the cream cheese is fully softened to avoid lumps in the filling.