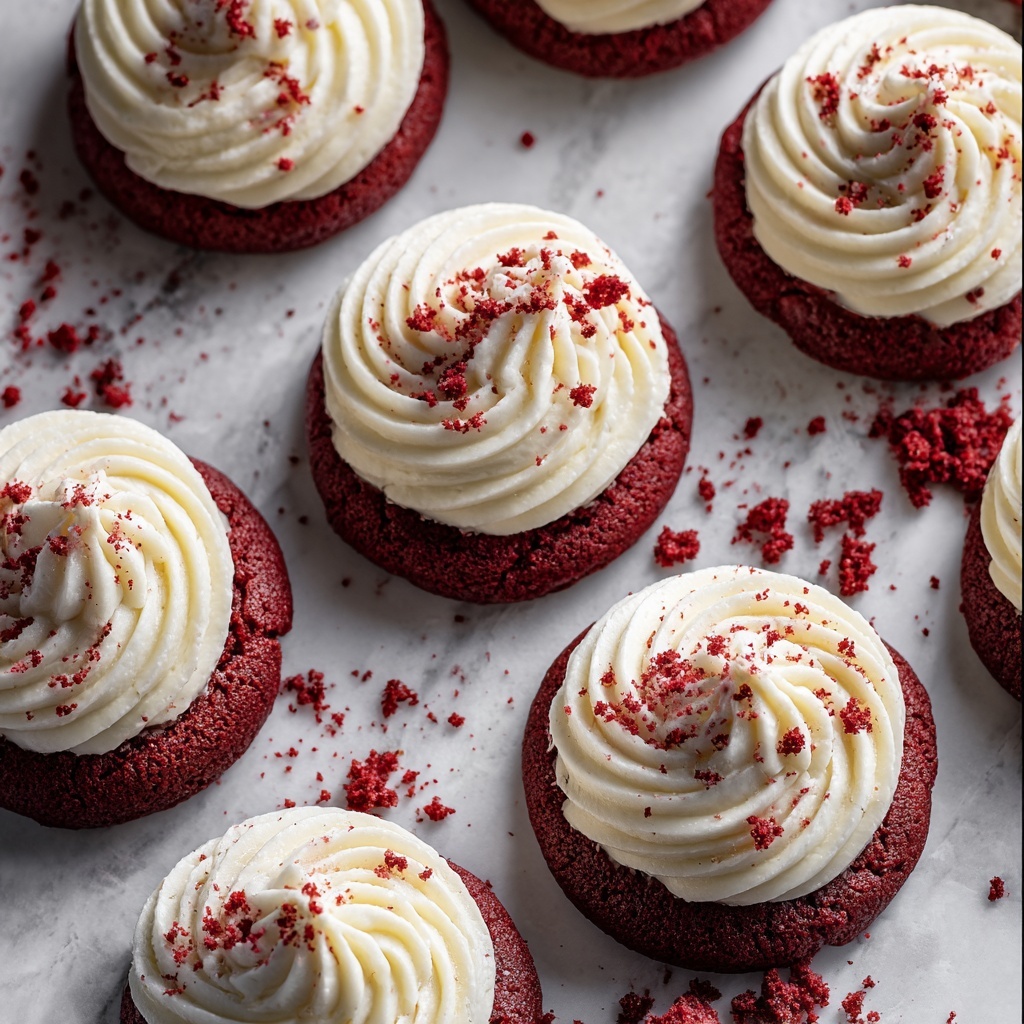
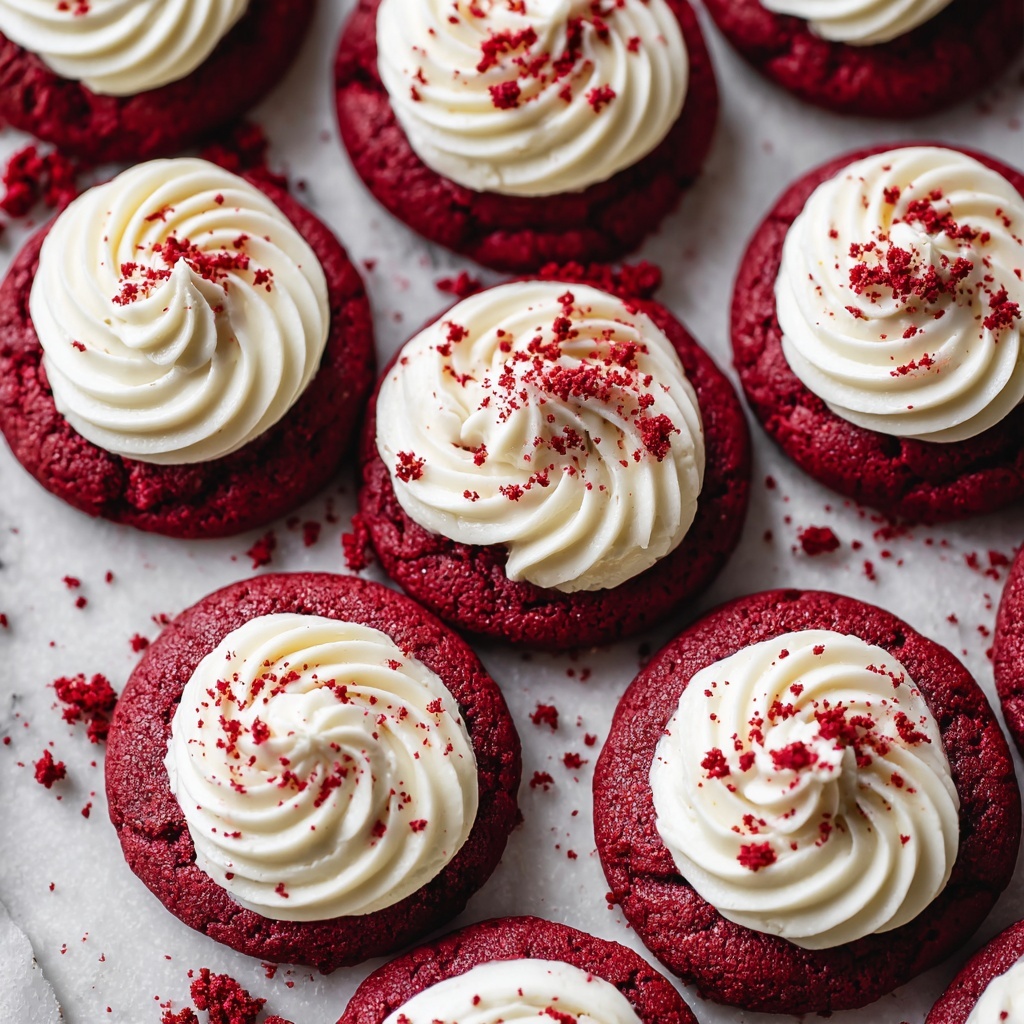
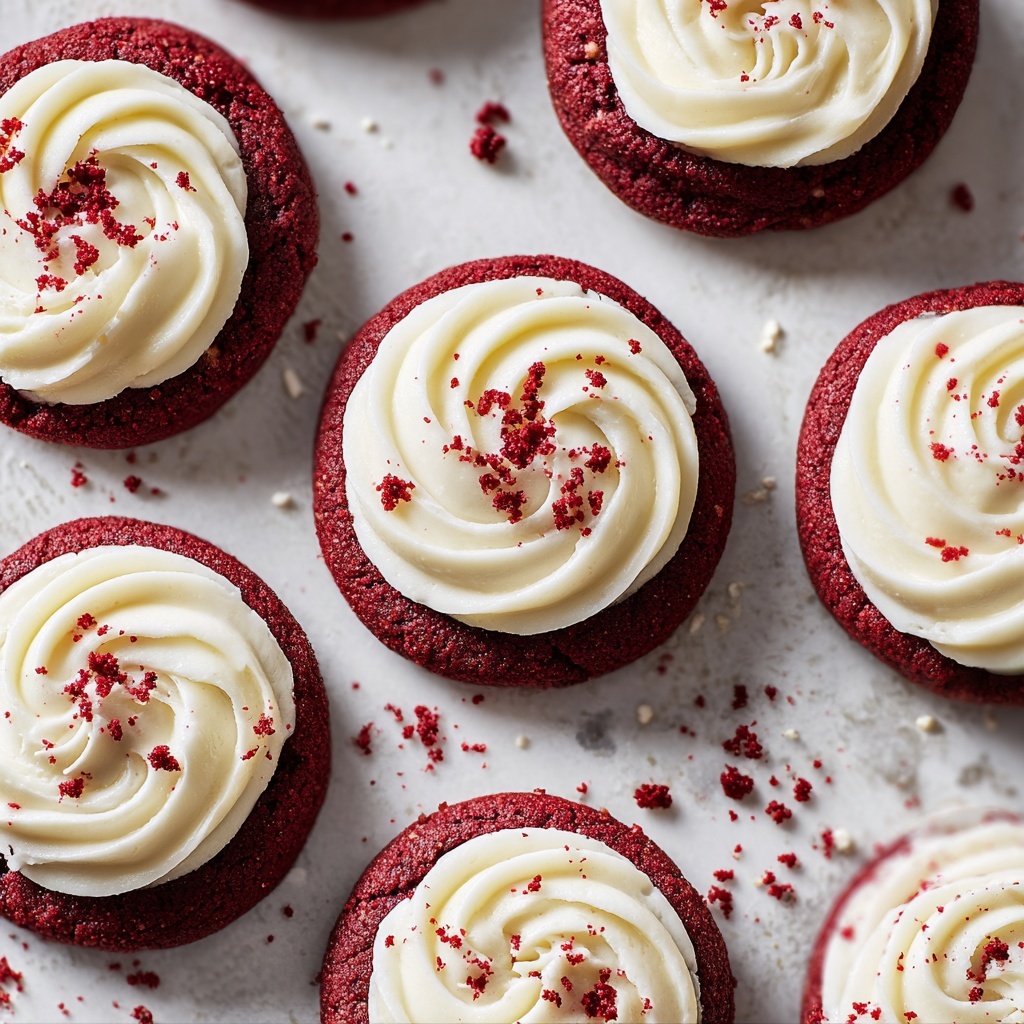
If you are searching for a delightful treat that perfectly blends a rich chocolatey flavor with a soft, velvety texture, look no further than this Red Velvet Cookie Cups with Cream Cheese Filling Recipe. These indulgent cookie cups capture the essence of classic red velvet cupcakes but with a fun twist — a luscious cream cheese center that melts in your mouth. Each bite delivers a perfect balance of sweetness, tang, and a beautiful pop of red color that’s sure to impress friends and family alike. Whether for a special occasion or an everyday treat, this recipe guarantees smiles and satisfied cravings all around.
Ingredients You’ll Need
Gathering the right ingredients is key to bringing the magic of these cookie cups to life. Each component plays an important role: from the creamy butter that adds richness, to the red food coloring giving that iconic hue, and the cream cheese filling providing a tangy surprise inside.
- ½ cup unsalted butter, softened: Provides a rich, tender base for the cookie dough.
- ½ cup granulated sugar: Adds essential sweetness and helps with the cookie’s structure.
- ½ cup brown sugar, packed: Gives moisture and a subtle caramel note.
- 1 large egg: Binds all ingredients while enhancing texture and richness.
- 1 teaspoon vanilla extract: Infuses warmth and depth to the flavor.
- 1 tablespoon red food coloring: Creates the signature vibrant red color.
- 1 teaspoon white vinegar: Reacts with baking soda to help leaven the cookies and balance sweetness.
- 1 ¼ cups all-purpose flour: The foundation of your cookie’s chewy yet soft body.
- ¼ cup unsweetened cocoa powder: Adds a subtle chocolate undertone essential for red velvet.
- ½ teaspoon baking soda: A leavening agent that helps the cookies rise beautifully.
- ¼ teaspoon salt: Enhances overall flavor and balances sweetness.
- 4 ounces cream cheese, softened: Central to the luscious filling that melts in your mouth.
- ¼ cup powdered sugar: Sweetens and smooths the cream cheese filling.
- ½ teaspoon vanilla extract (for filling): Enhances the cream cheese with a sweet aromatic note.
How to Make Red Velvet Cookie Cups with Cream Cheese Filling Recipe
Step 1: Preheat and Prep
Begin by preheating your oven to 350°F (175°C) and line a baking sheet with parchment paper. This simple prep ensures your cookies bake evenly and don’t stick, making for a perfect golden edge and soft center.
Step 2: Make Cookie Dough
In a large bowl, cream together the softened butter, granulated sugar, and brown sugar until the mixture becomes light and fluffy. This step is crucial as it incorporates air, giving your cookies a soft texture that melts in your mouth. Next, beat in the egg, vanilla extract, red food coloring, and white vinegar until the batter is nice and smooth.
Step 3: Combine Dry Ingredients
In a separate bowl, whisk together the flour, unsweetened cocoa powder, baking soda, and salt. This careful mixing ensures that the cocoa powder and leaveners are evenly distributed. Gradually add these dry ingredients to your wet mixture and mix until just combined — be gentle to avoid over-mixing, which can affect the tender crumb.
Step 4: Prepare Cream Cheese Filling
In a small bowl, beat the softened cream cheese, powdered sugar, and vanilla extract together until the filling is smooth and creamy. This filling will be the delightful surprise nestled inside each cookie, providing a tangy and creamy balance to the sweet red velvet dough.
Step 5: Assemble Cookies
Now comes the fun part! Scoop about 1 tablespoon of cookie dough and flatten it slightly in your hand. Place approximately ½ teaspoon of the cream cheese filling in the center, then cover it with another tablespoon of dough, sealing the edges well. Roll the filled dough into a smooth ball and place on the prepared baking sheet. Repeat this process with the remaining dough and filling, making sure to space the cookies about 2 inches apart to allow for gentle spreading.
Step 6: Bake and Cool
Bake the cookies for 10-12 minutes or until they are just set and have slightly cracked tops. The smell at this stage is irresistible — warm, sweet, and inviting. Once out of the oven, let them cool on the baking sheet for 5 minutes before transferring to a wire rack to cool completely. This helps them firm up to the perfect chewy-soft texture you want.
How to Serve Red Velvet Cookie Cups with Cream Cheese Filling Recipe
Garnishes
These Red Velvet Cookie Cups with Cream Cheese Filling Recipe treats are stunning on their own, but you can take them to the next level by dusting a little powdered sugar or cocoa powder on top. Alternatively, a drizzle of white chocolate adds an elegant flair and a little extra sweetness. Fresh berries or edible flowers can also add color and freshness when serving for guests.
Side Dishes
Pair these cookie cups with a chilly glass of milk, a rich cup of coffee, or a frothy cappuccino for an amazing combination. If you want to keep things cozy and sweet, a scoop of vanilla or raspberry ice cream works beautifully alongside them — turning a simple cookie into a dreamy dessert experience.
Creative Ways to Present
Serve the cookie cups in cute mini cupcake liners to keep them neat and add to the fun red velvet vibe. For parties, arrange them on a tiered dessert tray or stack them with a few fresh mint leaves or sprigs of rosemary for a touch of green and a fragrant twist. They also pack perfectly in decorative boxes or jars as delightful homemade gifts!
Make Ahead and Storage
Storing Leftovers
Store any leftover Red Velvet Cookie Cups with Cream Cheese Filling Recipe treats in an airtight container at room temperature for up to 3 days. This keeps the cookies soft and the filling creamy without drying out or losing flavor. Avoid refrigeration unless your environment is particularly warm, as it can firm up the cream cheese filling too much.
Freezing
You can freeze these cookie cups unbaked or baked. For unbaked dough balls, freeze on a baking sheet until solid, then transfer to a freezer bag for up to 3 months. To freeze baked cookies, wrap them individually in plastic wrap and store in a freezer-safe bag. Thaw overnight at room temperature for best results, preserving that fresh-baked taste and texture.
Reheating
To enjoy these cookie cups warm, pop them in a preheated 300°F oven for 5-7 minutes, or microwave for about 10-15 seconds. Warming softens the cream cheese filling delightfully and makes the cookies taste freshly baked, which is perfect for an indulgent treat.
FAQs
Can I use less red food coloring?
Absolutely! You can adjust the amount of red food coloring to achieve the shade you prefer. Keep in mind that less color might result in a subtler shade and slightly less vibrant appearance, but the flavor will remain delicious.
Is there a substitute for cream cheese in the filling?
If you want to avoid cream cheese, you could try mascarpone or ricotta cheese for a different but still creamy texture. However, the distinct tangy flavor of cream cheese is a signature part of this recipe, so substitutes will change the overall taste.
Can I make these cookie cups gluten-free?
Yes, to make them gluten-free, swap the all-purpose flour for a 1-to-1 gluten-free baking flour blend. Be sure to check that your cocoa powder and other ingredients are gluten-free as well. The texture may be slightly different but still delightful!
How do I know when the cookies are fully baked?
Look for cookies that have set and show slight cracks on the surface but still feel soft to the touch. They will firm up as they cool, so avoid overbaking to keep the soft, chewy texture characteristic of red velvet treats.
Can I double the recipe for a larger batch?
Definitely! This Red Velvet Cookie Cups with Cream Cheese Filling Recipe scales well. Just be sure to maintain the same ratios and bake in batches for even cooking. Also, extra batches mean more tasty cookies to share or freeze!
Final Thoughts
I can’t recommend trying this Red Velvet Cookie Cups with Cream Cheese Filling Recipe enough. It’s a charming and fun way to enjoy the timeless flavors of red velvet combined with a creamy surprise inside. Whether you’re baking for holidays, a special occasion, or simply because you love a great dessert, these cookie cups will quickly become one of your go-to recipes that bring joy and a touch of magic to your kitchen. So gather your ingredients, roll up your sleeves, and get ready for a seriously delicious adventure!
Print
Red Velvet Cookie Cups with Cream Cheese Filling Recipe
- Prep Time: 15 minutes
- Cook Time: 12 minutes
- Total Time: 32 minutes
- Yield: 16 cookies
- Category: Dessert
- Method: Baking
- Cuisine: American
Description
These Red Velvet Cupcake Cookies combine the rich flavor of classic red velvet cake with the fun texture of a cookie, filled with a creamy and sweetened cream cheese center. Soft, moist, and beautifully red, these cookies make a perfect treat for dessert or special occasions.
Ingredients
Cookie Dough
- ½ cup unsalted butter, softened
- ½ cup granulated sugar
- ½ cup brown sugar, packed
- 1 large egg
- 1 teaspoon vanilla extract
- 1 tablespoon red food coloring
- 1 teaspoon white vinegar
- 1 ¼ cups all-purpose flour
- ¼ cup unsweetened cocoa powder
- ½ teaspoon baking soda
- ¼ teaspoon salt
Cream Cheese Filling
- 4 ounces cream cheese, softened
- ¼ cup powdered sugar
- ½ teaspoon vanilla extract
Instructions
- Preheat Oven: Preheat your oven to 350°F (175°C) and line a baking sheet with parchment paper to ensure cookies do not stick and bake evenly.
- Make Cookie Dough: In a mixing bowl, cream together the softened butter, granulated sugar, and brown sugar until the texture is light and fluffy. Add the egg, vanilla extract, red food coloring, and white vinegar, mixing thoroughly to combine all ingredients.
- Combine Dry Ingredients: In a separate bowl, whisk the all-purpose flour, cocoa powder, baking soda, and salt together. Gradually incorporate these dry ingredients into the wet mixture, mixing until just combined to avoid overworking the dough.
- Prepare Cream Cheese Filling: Beat together the softened cream cheese, powdered sugar, and vanilla extract in a small bowl until the mixture is smooth and creamy, forming the filling for the cookies.
- Assemble Cookies: Scoop one tablespoon of cookie dough and flatten it slightly in your hand. Place about ½ teaspoon of the cream cheese filling in the center. Cover with another tablespoon of dough, seal the edges carefully, and roll into a smooth ball. Repeat this process with the remaining dough and filling.
- Bake: Arrange the filled cookie balls on the prepared baking sheet, spacing them about 2 inches apart to allow for spreading. Bake in the preheated oven for 10-12 minutes until the cookies are set and have slight cracks on top.
- Cool and Serve: Remove the cookies from the oven and let them cool on the baking sheet for about 5 minutes. Then transfer them to a wire rack to cool completely before serving to ensure the cream cheese filling remains intact and the cookies hold their shape.
Notes
- Ensure the butter and cream cheese are softened to room temperature for better mixing and texture.
- Use gel-based red food coloring for a richer color without affecting the batter consistency.
- Do not overmix the dough once the dry ingredients are added to keep the cookies tender.
- Chilling the dough for 30 minutes before baking can help the cookies hold their shape better.
- Store cookies in an airtight container in the refrigerator for up to 5 days due to the cream cheese filling.


