
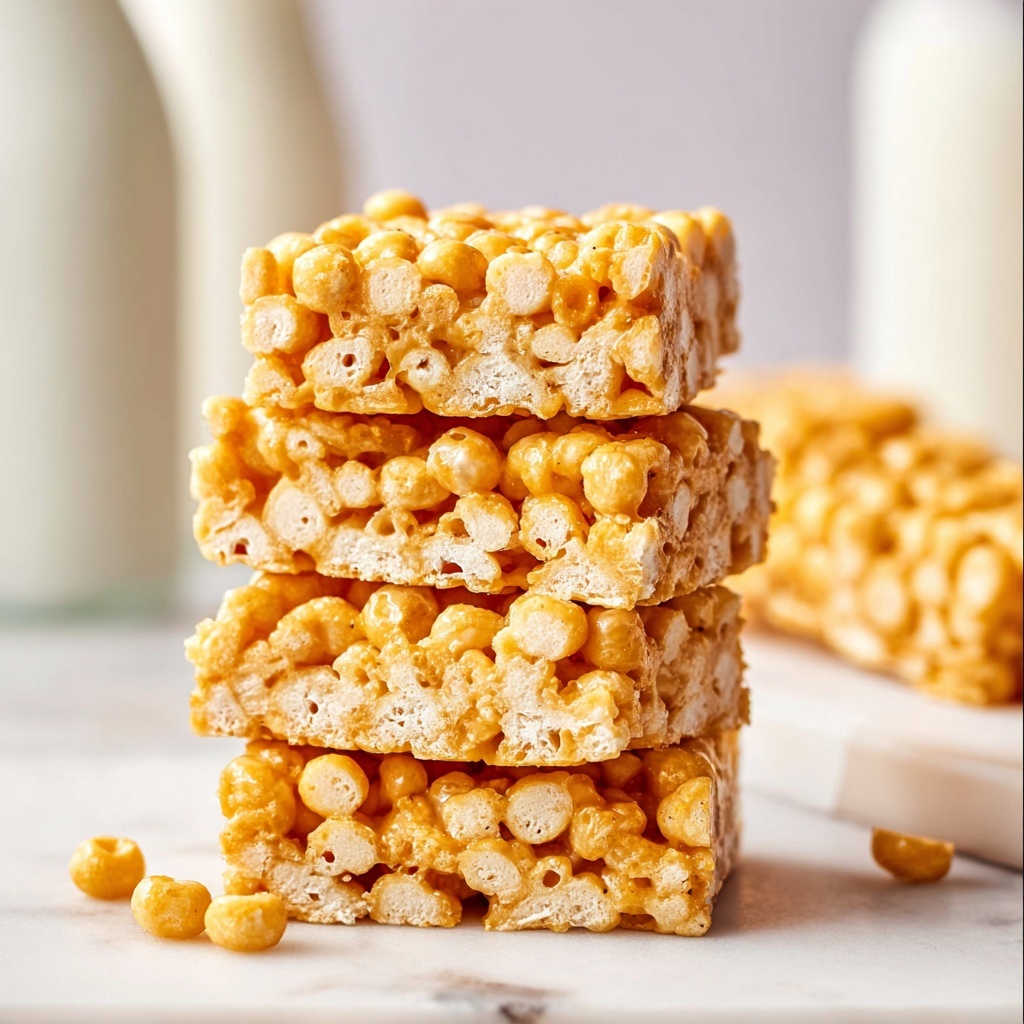
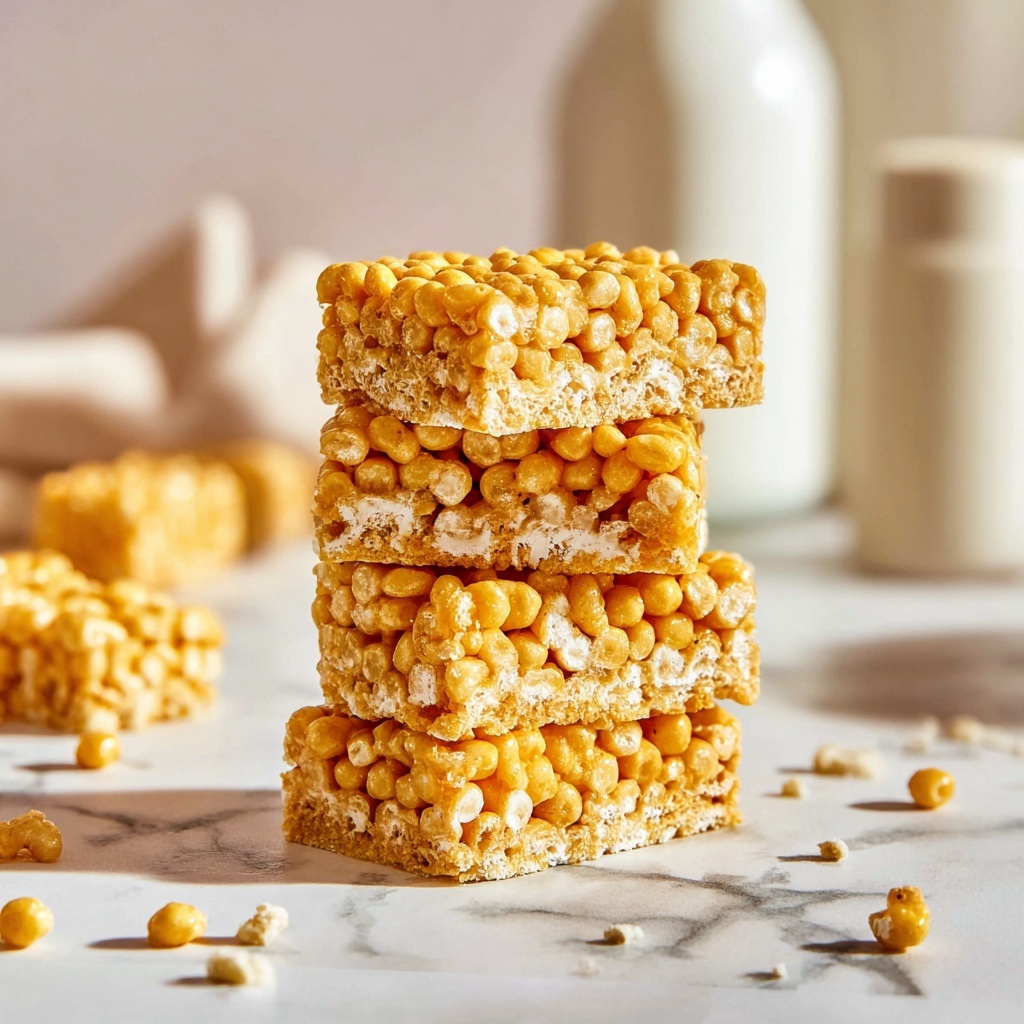
If you’re craving a nostalgic treat that’s quick, tasty, and perfect for any occasion, this Cereal Bars Recipe is exactly what you need. Imagine crunchy corn pops cereal all wrapped up in a luscious, gooey marshmallow and butter mixture, coming together in sweet, chewy squares that bring back childhood magic with every bite. Whether you’re whipping these up for a snack, party, or lunchbox surprise, these bars are a delightful crowd-pleaser that’s as simple as it is satisfying.
Ingredients You’ll Need
These ingredients are straightforward but mighty in delivering the perfect balance of flavor and texture. Each component plays a starring role in making your Cereal Bars Recipe irresistibly delicious, from the rich butter that adds smoothness to the crunchy, toasted cereal that gives every bite a satisfying snap.
- 6 tablespoons (84 g) unsalted butter: Adds a creamy richness that melts perfectly with the marshmallows.
- 10 ounce (284 g) bag of large marshmallows: The secret to that smooth, sticky texture that binds everything beautifully.
- 7 cups (196 g) corn pops cereal: Brings light crunch and a touch of sweetness for that classic cereal bar experience.
How to Make Cereal Bars Recipe
Step 1: Prepare the Baking Pan
Start by lining the bottom of a 9×13-inch baking pan with parchment paper. This simple step ensures your bars won’t stick and makes cleanup a breeze. Having the pan ready will help you move quickly once the mixture is combined.
Step 2: Melt Butter and Marshmallows
In a large pot over medium-high heat, melt the butter until it’s fully liquid and warm. Add the marshmallows and stir continuously to prevent burning. This stage is crucial because the smooth, gooey marshmallow-butter blend is the foundation of your bars’ unbeatable texture. Keep stirring until everything is melted and combined into a silky sauce.
Step 3: Mix in Cereal
Once your marshmallow mixture is ready, remove the pot from heat and immediately fold in the corn pops cereal. Mix thoroughly so each crunchy piece is well-coated. If you love a slightly drier, crunchier bar, you can stir in an extra half cup of cereal at this point to adjust the gooeyness perfectly.
Step 4: Spread and Shape
Pour the mix into your prepared pan, then gently press it down with the back of a silicone spatula. Aim to spread it evenly, but don’t press too hard—a light touch keeps the bars airy and chewy instead of dense. This step shapes your bars and ensures every bite holds together.
Step 5: Cool and Cut
Let the mixture cool completely in the pan for about two hours. Once set, lift your block out using the edges of the parchment paper and slice into 12 perfect squares. These chewy, crispy bars are now ready to enjoy or share!
How to Serve Cereal Bars Recipe
Garnishes
While these bars are fantastic on their own, try sprinkling some mini chocolate chips or colorful sprinkles on top before the mixture cools for a festive look. A drizzle of melted chocolate or a dusting of powdered sugar can add a fun twist and elevate presentation for special occasions.
Side Dishes
Cereal bars make a fantastic pairing with fresh fruit or a creamy yogurt dip for a balanced snack or an easy breakfast combo. For an after-school treat, offer them alongside a cold glass of milk or a warm cup of cocoa to keep the cozy vibes flowing.
Creative Ways to Present
For parties or gift-giving, wrap individual bars in clear cellophane tied with a colorful ribbon. You can also layer them in decorative tins or stack them with parchment paper between squares to keep them neat. These little touches make your homemade cereal bars feel like a special, thoughtful gift.
Make Ahead and Storage
Storing Leftovers
Store any leftover cereal bars in an airtight container at room temperature for up to five days. Keep them covered to maintain their chewy texture and prevent them from drying out. They’re perfect for grabbing on the go or packing into lunchboxes throughout the week.
Freezing
If you want to keep these cereal bars fresh longer, wrap them individually in plastic wrap and place them in a freezer-safe bag or container. They freeze wonderfully for up to two months. When you’re ready, just thaw them at room temperature for about an hour before serving.
Reheating
While cereal bars are typically enjoyed at room temperature, if you prefer a warm version, microwave a bar for about 10 to 15 seconds to soften the marshmallow, then let it cool slightly before eating. This melts the inside just enough to feel freshly made without becoming too sticky.
FAQs
Can I use a different cereal for this Cereal Bars Recipe?
Absolutely! While corn pops cereal gives a classic crunch and flavor, you can experiment with rice cereal, puffed wheat, or even granola for different textures and tastes. Just be mindful that the taste and chewiness will vary accordingly.
Is it necessary to use unsalted butter?
Using unsalted butter lets you control the saltiness of your bars, but if salted butter is what you have on hand, that works fine too. It might add a subtle savory note that balances the sweet marshmallows nicely.
Can I add mix-ins like nuts or chocolate chips?
Definitely! Feel free to fold in chopped nuts, raisins, or mini chocolate chips right after mixing the cereal with the marshmallow blend. These additions will add more flavors and textures, making your cereal bars uniquely yours.
How do I prevent the cereal bars from sticking to the pan?
Lining your baking pan with parchment paper is the trick to easy removal. You can also lightly grease the paper or your spatula before pressing the mixture down to avoid sticking, ensuring clean squares every time.
Are these cereal bars suitable for kids’ lunchboxes?
Yes! These bars are a kid-favorite snack that’s easy to pack and hold up well during the day. Just store them in a sealed container or wrap them individually to keep them fresh and mess-free until snack time.
Final Thoughts
I can’t recommend this Cereal Bars Recipe enough for anyone who wants a fast, tasty homemade treat with minimal effort and maximum flavor. Every layer of gooey sweetness, crunchy texture, and buttery goodness feels like a warm hug in bar form. So grab your ingredients, follow these easy steps, and enjoy making this little slice of happiness with friends or family—you’re going to love every bite!
Print
Cereal Bars Recipe
- Prep Time: 5 minutes
- Cook Time: 10 minutes
- Total Time: 15 minutes plus 2 hours cooling
- Yield: 12 servings
- Category: Snack
- Method: Stovetop
- Cuisine: American
Description
These easy-to-make Cereal Bars combine the classic sweetness of melted marshmallows and butter with crunchy corn pops cereal. Perfect as a quick snack or a treat for kids, they require minimal ingredients and no baking! Enjoy gooey, chewy bars that can be customized for texture with extra cereal.
Ingredients
Ingredients
- 6 tablespoons (84 g) unsalted butter
- 10 ounce (284 g) bag of large marshmallows
- 7 cups (196 g) corn pops cereal
Instructions
- Prepare the Baking Pan: Line the bottom of a 9×13-inch baking pan with parchment paper. Set aside to have it ready for the mixture.
- Melt Butter and Marshmallows: In a large pot over medium-high heat, melt the butter. Add the marshmallows to the melted butter and stir continuously to ensure the marshmallows melt evenly without burning. Stir frequently to create a smooth, gooey mixture.
- Mix in Cereal: Once the marshmallows have melted and combined with the butter, remove the pot from heat. Immediately add the corn pops cereal and mix thoroughly until all cereal pieces are evenly coated. For a less gooey texture, you can add an extra 1/2 cup of cereal at a time.
- Spread and Shape: Pour the cereal mixture into the prepared baking pan. Using the back of a silicone spatula, gently press down and evenly distribute the mixture throughout the pan, making sure not to compress it too much to avoid dense bars.
- Cool and Cut: Allow the mixture to cool and set in the pan for about 2 hours. Once completely cooled, lift the set bars out using the parchment paper and cut them into squares to serve.
Notes
- For firmer bars, add extra cereal as suggested to reduce gooeyness.
- Use parchment paper to easily lift bars from the pan without sticking.
- These bars are best stored in an airtight container at room temperature and consumed within a few days.
- Optionally, you can add mix-ins like chocolate chips or nuts for variety.

