
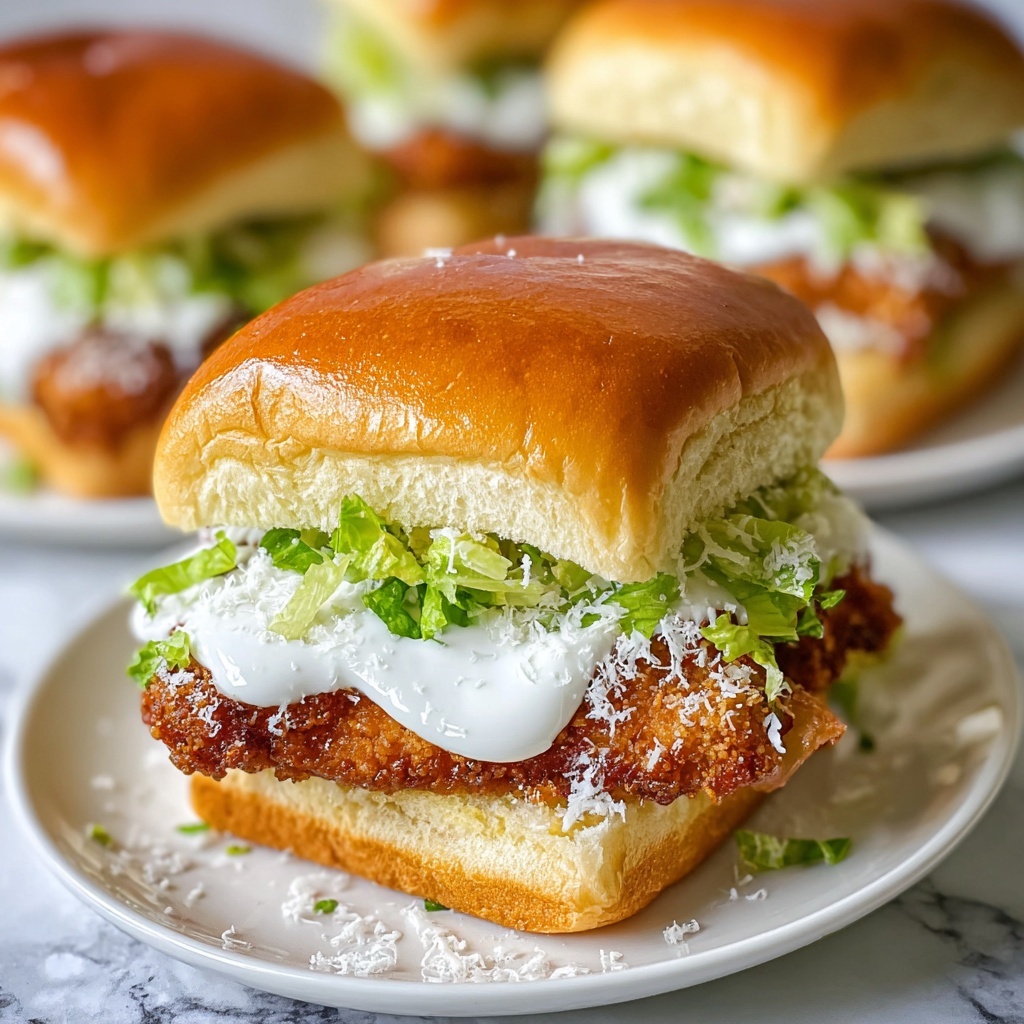
If you’re craving something that hits all the right notes—crunchy, savory, creamy, and fresh—then this Crispy Chicken Caesar Sandwich Recipe is about to become your new favorite go-to. Imagine tender chicken breasts, breaded with a Parmesan-studded panko crust that fries up perfectly crispy, nestled inside a toasted buttery roll, and layered with crisp Romaine lettuce, zesty Caesar dressing, and shaved Parmesan. Every bite offers a satisfying crunch and a burst of classic Caesar salad flavors, but in a handheld sandwich that’s downright addictive. It’s comfort food elevated with a touch of elegance, and I can’t wait for you to make it your own!
Ingredients You’ll Need
The beauty of this Crispy Chicken Caesar Sandwich Recipe lies in its straightforward, fresh ingredients. Each component plays a crucial role: the seasoned flour and buttermilk tenderize and flavor the chicken, the panko and Parmesan create that irresistible crunch, and the classic Caesar toppings bring brightness and creaminess that balance everything perfectly.
- Boneless, skinless chicken breasts: Pounded evenly to ensure juicy, consistent cooking every time.
- All-purpose flour: Provides a light base coating that helps the seasonings stick to the chicken.
- Salt and black pepper: Basic seasonings that elevate the natural flavors of the chicken and flour mixture.
- Garlic powder and onion powder: Add a flavorful depth that’s subtle but essential.
- Buttermilk: Tenderizes the chicken and helps the breadcrumbs cling for a perfect crust.
- Panko breadcrumbs: The secret to that extra-crispy texture everyone loves.
- Grated Parmesan cheese: Mixed with breadcrumbs to add a savory, cheesy crunch.
- Olive oil: For frying the chicken to golden perfection.
- Large sandwich rolls: Toasted and brushed with garlic butter for a rich, crisp bite.
- Romaine lettuce: Shredded for refreshing crunch and authentic Caesar salad feel.
- Caesar dressing: Creamy, tangy, and absolutely necessary for that classic Caesar profile.
- Shaved Parmesan cheese: The finishing touch that ties the whole sandwich together.
- Melted butter and minced garlic: Combined to give the sandwich rolls that irresistible garlic butter toast.
How to Make Crispy Chicken Caesar Sandwich Recipe
Step 1: Prepare the Oven and Chicken
Start by preheating your oven to 400°F (200°C). Next, gently pound each chicken breast with a meat mallet so they’re an even thickness—this ensures the chicken cooks evenly and stays juicy inside while achieving a nice crispy exterior.
Step 2: Set Up Your Breading Stations
In one shallow dish, mix the flour with salt, black pepper, garlic powder, and onion powder. Pour buttermilk into a second dish, and in a third, combine the panko breadcrumbs with grated Parmesan cheese. This three-step breading process is the perfect way to create a thick, flavorful crust that locks in moisture and gives the chicken an amazing texture.
Step 3: Bread the Chicken
Take the chicken breasts one at a time. Dredge each in the seasoned flour, shaking off any excess, then dip into the buttermilk, letting the extra drip off. Finally, press each breast firmly into the breadcrumb and Parmesan mixture, coating it evenly. This ensures every bite will have that signature crispy, cheesy crunch.
Step 4: Fry the Chicken
Heat olive oil in a large skillet over medium heat. Carefully fry the breaded chicken breasts for about 4 minutes on each side or until golden and crunchy. As each piece finishes, transfer it to a baking sheet to rest briefly before finishing in the oven. This step locks in the crunch while cooking the chicken through.
Step 5: Finish Cooking in the Oven
Slide the baking sheet with fried chicken into the preheated oven. Bake for about 15 minutes or until the chicken is fully cooked inside. This final step guarantees a tender, juicy center while keeping that crispy exterior intact.
Step 6: Toast the Garlic Butter Rolls
Mix melted butter with minced garlic and brush this flavorful mixture on the cut sides of the sandwich rolls. Place them on a baking sheet and toast in the oven for about 5 minutes until golden brown and inviting. This simple garlic butter toast adds a comforting richness that backgrounds the star of the sandwich—the chicken.
Step 7: Assemble Your Crispy Chicken Caesar Sandwich Recipe
Now the fun part! Lay each crispy chicken breast on the bottom half of a roll. Pile on the shredded Romaine lettuce for fresh crunch, then drizzle generously with creamy Caesar dressing. Finally, sprinkle shaved Parmesan cheese over the top, and crown with the toasted roll halves. The result is a beautifully layered sandwich full of textures and classic Caesar flavors.
How to Serve Crispy Chicken Caesar Sandwich Recipe

Garnishes
Consider adding a few anchovy fillets or a squeeze of fresh lemon over the lettuce for an extra tangy kick. A few cracked black pepper sprinkles or extra shaved Parmesan can also elevate presentation and taste.
Side Dishes
Pair your Crispy Chicken Caesar Sandwich with crispy sweet potato fries or a light, refreshing cucumber salad to balance the richness. A side of pickles or even a simple bowl of fresh fruit can also complement the flavors while keeping things bright.
Creative Ways to Present
Try serving the sandwich open-faced for a casual lunch or cut in half diagonally and secured with a decorative toothpick for a pretty presentation at gatherings. You can even swap the sandwich rolls for ciabatta or focaccia bread for a different twist on texture.
Make Ahead and Storage
Storing Leftovers
If you happen to have leftovers—though that’s unlikely—wrap your sandwich tightly in foil or plastic wrap and refrigerate. It’s best enjoyed within 1-2 days for optimal freshness, as the crispy coating softens over time.
Freezing
You can freeze the breaded but uncooked chicken breasts before frying. Arrange them on a baking sheet to freeze individually before transferring to a freezer bag. When ready to use, thaw in the fridge overnight, then fry and bake as directed for fresh, crispy results.
Reheating
To keep the chicken crispy when reheating, warm it in the oven at 350°F for about 10-15 minutes rather than the microwave, which tends to make crusts soggy. Toast the rolls again lightly to regain that garlic butter crunch, then reassemble before serving.
FAQs
Can I use chicken thighs instead of breasts?
Absolutely! Boneless, skinless chicken thighs work well and offer more juiciness, but you may need to adjust cooking times slightly since thighs are usually thicker and fattier.
What if I don’t have buttermilk?
You can easily make a substitute by adding a tablespoon of lemon juice or white vinegar to a cup of regular milk. Let it sit for 5 minutes, and it will mimic buttermilk’s tenderizing effect.
Is there a way to make this sandwich healthier?
Yes! Baking the breaded chicken instead of frying reduces oil content, and opting for whole-grain sandwich rolls adds fiber. You could also lighten the Caesar dressing or use a yogurt-based version.
Can I prepare the breading ahead of time?
You can mix the seasoned flour and breadcrumb mixtures a day ahead and store them in airtight containers. For best results, bread the chicken fresh before cooking to maintain crispiness.
How do I make sure the chicken stays juicy inside?
Pounding the chicken to an even thickness and using buttermilk for marinating help immensely. Also, frying until golden and then finishing in the oven ensures thorough cooking without drying out the meat.
Final Thoughts
This Crispy Chicken Caesar Sandwich Recipe is such a delightful twist on two classic favorites—crispy chicken and Caesar salad—melded into one unforgettable bite. Whether you’re cooking for a casual weeknight dinner or impressing friends at a weekend gathering, this sandwich hits all the highs: crunchy, savory, creamy, and fresh. Give it a try, and I promise it’ll become a staple in your recipe collection as quickly as it did in mine!
Print
Crispy Chicken Caesar Sandwich Recipe
- Prep Time: 25 minutes
- Cook Time: 40 minutes
- Total Time: 1 hour 5 minutes
- Yield: 4 sandwiches
- Category: Sandwich
- Method: Frying
- Cuisine: American
Description
This Crispy Chicken Caesar Sandwich recipe features tender, breaded chicken breasts fried to golden perfection, then baked to ensure a juicy inside. Served on toasted sandwich rolls with fresh Romaine lettuce, Caesar dressing, and Parmesan cheese, this sandwich offers a flavorful twist on the classic Caesar salad with a satisfying crispy texture and rich taste.
Ingredients
Chicken and Breading
- 4 boneless, skinless chicken breasts
- 1 cup all-purpose flour
- Salt, to taste
- Black pepper, to taste
- 1 teaspoon garlic powder
- 1 teaspoon onion powder
- 1 cup buttermilk
- 2 cups panko breadcrumbs
- 1/2 cup grated Parmesan cheese
- 1/4 cup olive oil, for frying
Sandwich Assembly
- 4 large sandwich rolls, split
- 1 cup Romaine lettuce, shredded
- 1/2 cup Caesar dressing
- 1/4 cup shaved Parmesan cheese
- 2 tablespoons melted butter
- 1 clove garlic, minced
Instructions
- Preheat Oven: Preheat your oven to 400°F (200°C) to prepare for baking the chicken and toasting the sandwich rolls.
- Prepare Chicken: Pound the chicken breasts to an even thickness using a meat mallet to ensure they cook evenly.
- Mix Flour Coating: In a shallow dish, combine the all-purpose flour, salt, black pepper, garlic powder, and onion powder. This mixture will season the chicken and help the coating stick.
- Prepare Buttermilk Dip: Pour the buttermilk into another shallow dish, which will tenderize the chicken and provide moisture for the breadcrumbs to adhere.
- Mix Breadcrumb Coating: In a third dish, mix the panko breadcrumbs with the grated Parmesan cheese for a crispy, flavorful crust.
- Coat Chicken: Dredge each chicken breast first in the flour mixture, shaking off excess. Then dip into the buttermilk, allowing excess to drip off, and finally coat thoroughly in the breadcrumb-Parmesan mixture.
- Fry Chicken: Heat the olive oil in a large skillet over medium heat. Fry each chicken breast until golden and crispy, about 4 minutes per side. Remove the chicken and place it on a baking sheet.
- Bake Chicken: Place the skillet-fried chicken breasts in the preheated oven and bake for about 15 minutes, or until the chicken is fully cooked through and reaches an internal temperature of 165°F (74°C).
- Prepare Garlic Butter: In a small bowl, mix the melted butter with the minced garlic to create a flavorful spread for the sandwich rolls.
- Toast Rolls: Brush the cut sides of the sandwich rolls with the garlic butter mixture. Place them on a baking sheet and toast in the oven for about 5 minutes or until golden brown.
- Assemble Sandwich: Place each crispy baked chicken breast on the bottom half of the toasted roll.
- Add Lettuce: Top the chicken with a generous portion of shredded Romaine lettuce.
- Dress and Cheese: Drizzle Caesar dressing over the lettuce, then sprinkle shaved Parmesan cheese on top.
- Close and Serve: Place the top half of the sandwich roll over the fillings to complete your Crispy Chicken Caesar Sandwich. Serve immediately.
Notes
- For extra crispiness, you can double dip the chicken by repeating the buttermilk and breadcrumb steps.
- If you prefer, use homemade Caesar dressing for a fresher taste.
- Make sure the oil is at medium heat to avoid burning the breadcrumbs before the chicken is cooked through.
- Allow the fried chicken to rest on a wire rack to retain crispiness before baking.
- Use a meat thermometer to ensure chicken is cooked to a safe internal temperature of 165°F (74°C).


