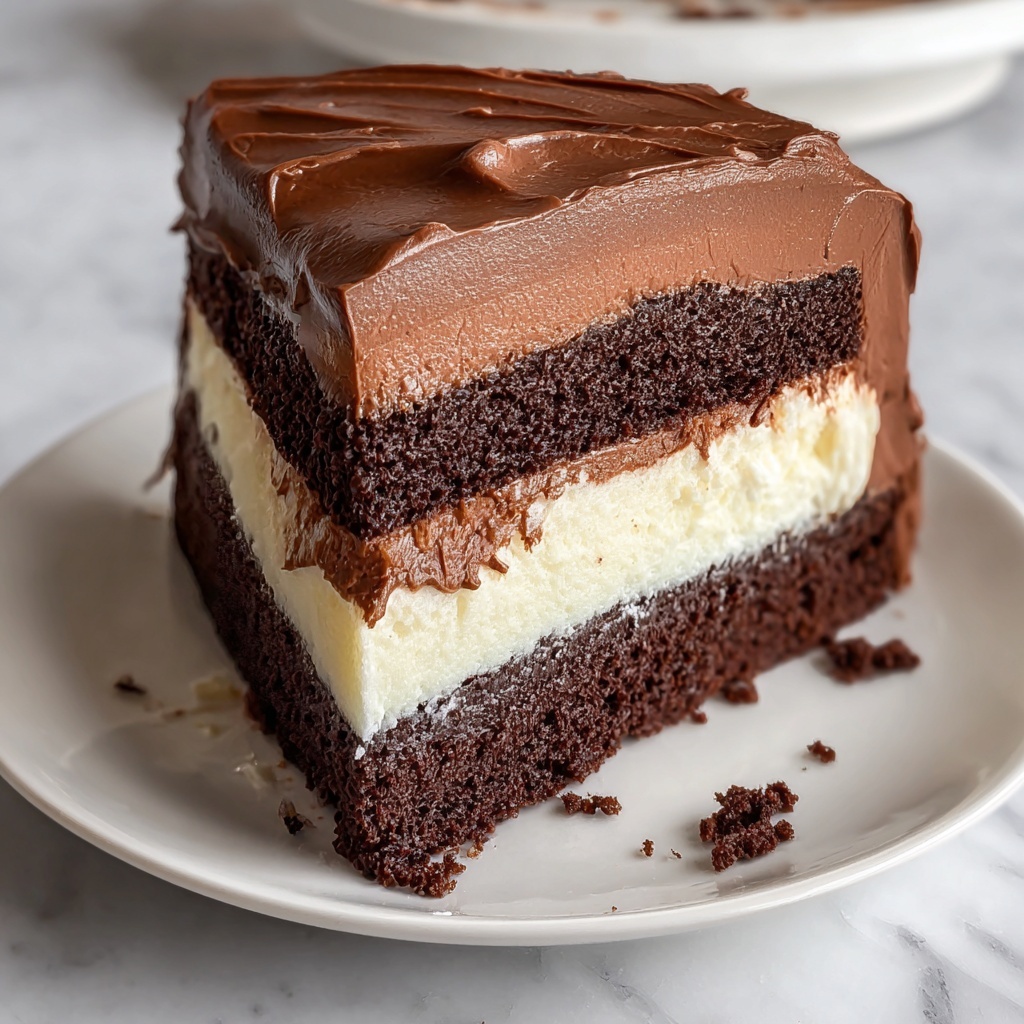
If you have a soft spot for rich, moist, and decadent desserts, then you’re in for a real treat with The Most Amazing Classic Chocolate Cake Recipe. This iconic cake is a celebration of pure chocolate indulgence, combining a perfectly tender crumb with luscious cream filling and silky frosting that will have everyone asking for seconds. Whether you’re baking for a special occasion or simply to satisfy your chocolate cravings, this cake embodies joy in every bite and never fails to bring a smile.
Ingredients You’ll Need
Gathering the right ingredients is the first step toward baking perfection. Each item on this list plays a crucial role in creating the impeccable balance of flavor, moisture, and texture that makes The Most Amazing Classic Chocolate Cake Recipe truly unforgettable.
- All-purpose flour: The foundation that provides structure and crumb to your cake.
- Baking powder and baking soda: These leavening agents work together to give the cake a light and airy rise.
- Salt: Enhances flavor and balances the sweetness.
- Unsweetened cocoa powder: Packs rich chocolate flavor without added sugars.
- Granulated sugar: Sweetens and helps create a tender crumb.
- Eggs: Bind the ingredients while adding moisture and richness.
- Whole milk: Adds creaminess and helps develop the cake’s texture.
- Vegetable oil: Keeps the cake moist and soft for days.
- Vanilla extract: Enhances the chocolate flavor with its warm, familiar aroma.
- Boiling water: Intensifies the cocoa’s flavor and ensures a silky batter texture.
- Heavy whipping cream: Essential for creating a smooth and fluffy cream filling.
- Powdered sugar: Sweetens both the filling and frosting perfectly without graininess.
- Unsalted butter: The rich base for the luscious chocolate frosting.
- Milk: Adjusts the frosting’s consistency for easy spreading and finishing.
How to Make The Most Amazing Classic Chocolate Cake Recipe
Step 1: Prepare Your Cake Pans and Mix Dry Ingredients
Preheat your oven to 350°F (175°C) and grease and flour two 9-inch round cake pans. This little prep ensures the cakes will come out cleanly and keep their perfect shape. In a large bowl, sift together the flour, baking powder, baking soda, salt, cocoa powder, and sugar. Sifting not only combines everything evenly, but it also helps create a light texture.
Step 2: Combine Wet Ingredients and Beat the Batter
Add the eggs, milk, vegetable oil, and vanilla extract to the dry mixture. Beat on medium speed until your batter turns smooth and creamy. This is the moment when the magic begins – the batter embodies a silky promise of the moist cake to come.
Step 3: Add Boiling Water and Finalize Batter
Slowly pour the boiling water into the batter while stirring gently. The batter will be thin, but trust this step – it’s what keeps your cake moist and tender, ensuring each bite melts in your mouth.
Step 4: Bake the Cake Layers
Divide the batter evenly between the prepared pans and bake for 30 to 35 minutes. A toothpick inserted in the center should come out clean, signaling the cakes are perfectly baked. Let them cool in their pans for 10 minutes before transferring to a wire rack to cool completely – cooling is key so the layers don’t fall apart during assembly.
Step 5: Whip Up the Cream Filling
While the cake cools, whip the heavy cream, powdered sugar, and vanilla extract together until stiff peaks form. This luscious cream filling will add a refreshing, smooth layer that complements the chocolate beautifully.
Step 6: Make the Chocolate Frosting
Beat the softened butter with cocoa powder, powdered sugar, vanilla extract, and 2 tablespoons of milk until smooth. Add more milk as needed to reach your ideal consistency. This frosting is the final crown on your cake, silky and rich, making every slice a heavenly experience.
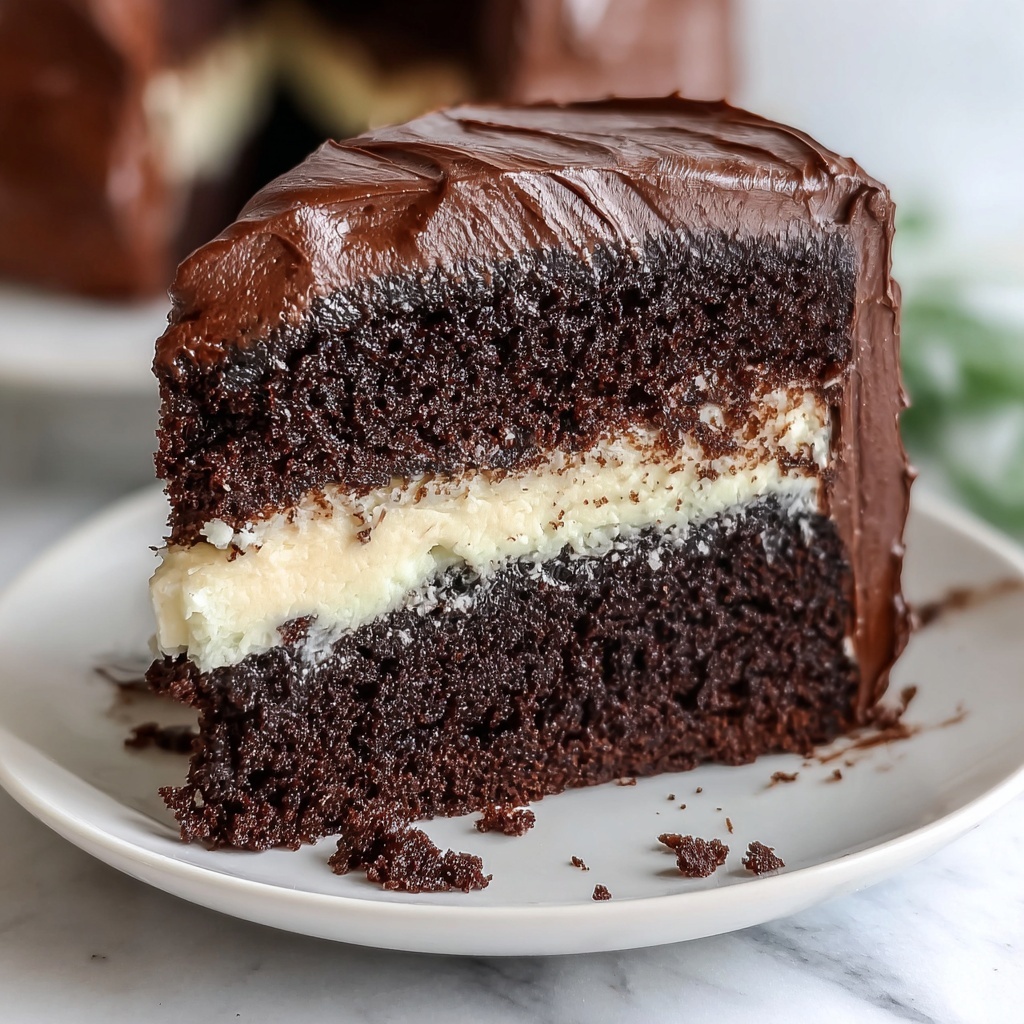
Step 7: Assemble the Cake
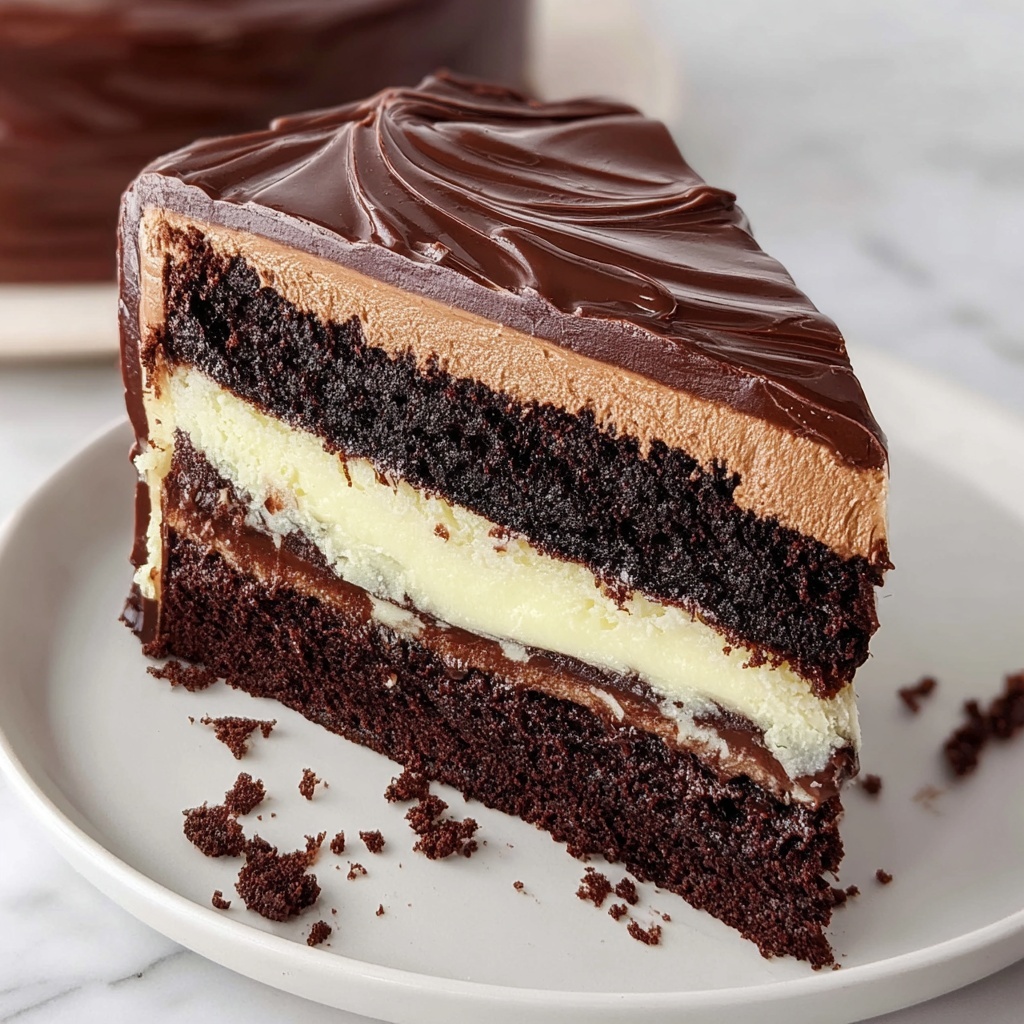
Place one cooled cake layer on your serving plate. Spread the whipped cream filling evenly on top, then gently place the second cake layer over it, pressing lightly to secure. Finally, frost the entire cake with your chocolate frosting, smoothing the top and sides. Feel free to get creative and add chocolate shavings or extra swirls of frosting for a stunning finish.
How to Serve The Most Amazing Classic Chocolate Cake Recipe
Garnishes
Simple garnishes can elevate your cake to the next level. Fresh berries, chocolate curls, or a dusting of cocoa powder bring a touch of elegance and enhance the chocolate’s richness. Mint leaves pair surprisingly well too, adding a fresh aroma that brightens each bite.
Side Dishes
While The Most Amazing Classic Chocolate Cake Recipe shines perfectly on its own, pairing it with a scoop of vanilla bean ice cream or a drizzle of caramel sauce can make dessert feel like an indulgent celebration. A cup of bold coffee or a glass of cold milk also balances the richness wonderfully.
Creative Ways to Present
Serve individual slices with a dollop of whipped cream and a sprinkle of toasted nuts or crushed cookies for added texture. For parties, consider turning the cake into cupcakes or cake pops using the same recipe—everyone loves a handheld chocolate treat!
Make Ahead and Storage
Storing Leftovers
Your cake will stay moist and delicious if stored covered at room temperature for up to two days. Beyond that, keeping it in the refrigerator, tightly wrapped, will preserve freshness for about 4 to 5 days. Just be sure to bring it back to room temperature before serving to enjoy the best flavor.
Freezing
You can freeze the baked cake layers wrapped tightly in plastic wrap and foil for up to 2 months. Freeze the frosting separately in an airtight container. When ready to enjoy, thaw everything in the refrigerator overnight before assembling and frosting for a fresh-from-the-oven taste.
Reheating
Since this is a cold dessert, reheating isn’t necessary, but if you want to warm a slice slightly, a few seconds in the microwave can enhance the gooey chocolate feel. Just be careful not to overheat and dry it out.
FAQs
Can I use different types of cocoa powder?
Yes! Both natural and Dutch-processed cocoa powders work, but they have slightly different flavors and acidity levels that might impact the cake’s texture. Natural cocoa tends to be more robust, while Dutch-processed offers a smoother taste.
Is it possible to make this cake gluten-free?
Absolutely. Substitute the all-purpose flour with a gluten-free blend designed for baking. Make sure it includes xanthan gum or another binder to maintain the cake’s structure and texture.
How do I ensure my cake stays moist?
The key is to measure ingredients accurately and not overbake. The boiling water in this recipe is essential in keeping the crumb tender, so follow the instructions carefully. Also, store the cake properly to prevent drying out.
Can I make this recipe dairy-free?
Yes. Use dairy-free milk like almond or oat milk, replace butter with a vegan margarine, and use coconut cream instead of heavy cream. The flavors might shift a bit, but it’s still delicious!
How long does it take to assemble and frost the cake?
Depending on your speed and experience, assembly and frosting typically take about 20 to 30 minutes. Taking your time ensures a beautiful and neat finish.
Final Thoughts
There’s something truly special about The Most Amazing Classic Chocolate Cake Recipe that keeps it a beloved favorite in so many homes. Baking it isn’t just about creating a dessert; it’s about crafting moments of joy and sharing love through every forkful. I encourage you to dive in, gather your ingredients, and soon you’ll be enjoying a cake that’s as irresistible as it sounds.
Print
The Most Amazing Classic Chocolate Cake Recipe
- Prep Time: 20 minutes
- Cook Time: 35 minutes
- Total Time: 1 hour 30 minutes
- Yield: 12 servings
- Category: Dessert
- Method: Baking
- Cuisine: American
Description
This classic chocolate cake recipe delivers a moist and rich chocolate flavor, featuring a tender cake layered with a fluffy cream filling and topped with smooth chocolate frosting. Perfect for celebrations or any chocolate craving, this cake combines simple ingredients into a timeless dessert that is both elegant and irresistibly delicious.
Ingredients
For the Cake:
- 1 3/4 cups all-purpose flour
- 1 1/2 teaspoons baking powder
- 1/2 teaspoon baking soda
- 1/2 teaspoon salt
- 1/2 cup unsweetened cocoa powder
- 1 cup granulated sugar
- 2 large eggs
- 1 cup whole milk
- 1/2 cup vegetable oil
- 1 teaspoon vanilla extract
- 1 cup boiling water
For the Cream Filling:
- 1/2 cup heavy whipping cream
- 1/4 cup powdered sugar
- 1/2 teaspoon vanilla extract
For the Chocolate Frosting:
- 1 cup unsalted butter, softened
- 1/2 cup unsweetened cocoa powder
- 3–4 cups powdered sugar
- 1/2 teaspoon vanilla extract
- 2–4 tablespoons milk
Instructions
- Make the Cake: Preheat your oven to 350°F (175°C). Prepare two 9-inch round cake pans by greasing and flouring them to ensure the cakes don’t stick.
- Mix Dry Ingredients: In a large bowl, sift together the all-purpose flour, baking powder, baking soda, salt, unsweetened cocoa powder, and granulated sugar for a uniform, light batter.
- Add Wet Ingredients: Incorporate the eggs, whole milk, vegetable oil, and vanilla extract into the dry ingredients. Beat on medium speed using a mixer until the batter is smooth and well combined.
- Add Boiling Water: Gradually add the boiling water to the batter while mixing to thin it out. The batter will be noticeably thin at this stage, which helps create a moist cake.
- Bake: Pour the thin batter evenly into the prepared pans. Bake for 30 to 35 minutes or until a toothpick inserted into the center comes out clean, indicating the cakes are fully baked.
- Cool Cakes: Let the cakes cool in the pans for 10 minutes, then invert them onto wire racks to cool completely. Cooling fully is important for frosting application.
- Prepare the Cream Filling: In a clean mixing bowl, whip the heavy whipping cream, powdered sugar, and vanilla extract until stiff peaks form, creating a light and fluffy filling.
- Make the Chocolate Frosting: Beat together the softened butter, cocoa powder, powdered sugar, vanilla extract, and 2 tablespoons of milk. Adjust the consistency by adding additional milk 1 tablespoon at a time until smooth and spreadable.
- Assemble the Cake: Place one cake layer on a serving plate. Spread the whipped cream filling evenly over the surface to add a creamy layer.
- Add Second Layer: Carefully place the second cake layer on top of the filling and gently press down to secure the layers.
- Frost the Cake: Use the chocolate frosting to cover the top and sides of the assembled cake. Decorate further with extra frosting or chocolate shavings as desired for a beautiful finish.
Notes
- Ensure the boiling water is added slowly and mixed well to maintain the batter consistency and cake moisture.
- For best results, allow the cake layers to cool completely before filling and frosting to prevent melting or sliding.
- You can substitute whole milk with buttermilk for a richer flavor and tender crumb.
- If you prefer a stronger chocolate flavor, add an extra tablespoon of cocoa powder but balance sweetness accordingly.
- Store leftover cake covered in the refrigerator for up to 3 days to maintain freshness.

